#1 Gymnastic Ring Dips Guide For All—ACHIEVE YOUR PEAK
If you want strong, balanced upper body strength that holds up in real-life movement, gymnastic ring dips are essential. Start with support holds and negative dips to build stability, and aim to progress into full dips as you get comfortable. Keep your shoulders down, core engaged, and avoid common mistakes like shrugging or letting your elbows flare. With the right technique and gradual progression, ring dips are one of the most effective ways to build functional power and control across your chest, shoulders, triceps, and core.
We’ll cover today:
- What are gymnastic ring dips & why are they important?
- 3 Key muscles worked with dips on gymnastic rings
- Benefits of dips on gymnastic rings for all levels
- Setting up your rings
- Progressions to master gymnastic ring dips
- Perfecting form for injury-free gymnastic ring dips
- 4 Common mistakes & how to fix them
- Targeted ring dip training plans for every level
- Customizing ring dips for your body & goals
- Recovery & tendon health for longevity
- Advanced variations for seasoned athletes
- Ring dips vs. other exercises
- 4 Ways to track your progress and stay motivated
- FAQs
What are gymnastic ring dips & why are they important?
Gymnastic ring dips are no ordinary upper-body exercise. They push your shoulders, chest, and core stability up a notch—and then some.
With ring dips, you’re not just moving weight up and down. You’re controlling every inch of instability, calling on every deep stabilizer muscle in your shoulders and chest to keep you steady. That’s where the real gains lie. Each rep tests you, and each rep is worth it.
Rings are no gimmick. They’re bombproof gear for anyone serious about functional strength that matters outside the gym.
Why ring dips are essential for real, usable strength
Ring dips build what’s known as functional strength—the kind that powers you through a whole range of exercises and real-life movement.
Here’s why that’s a big deal:
- Better stability and control: Gymnastic ring dips fire up those deep stabilizers that standard dip bars and machines miss. This means better balance, joint control, and coordination in your shoulders and core, making it essential for anyone keen on bodyweight strength.
- Bigger muscle gains: Ring dips work your chest, triceps, shoulders, and upper back, hard. The rings don’t hold a fixed path, so your muscles are constantly adjusting to keep you balanced. It’s no walk in the park, but the payoff’s real.
- Shoulder health and mobility: Ring dips bring in a unique element for shoulder mobility, increasing your range of motion and helping prevent injury. It’s perfect if you’re in it for long-term gains and staying injury-free.
3 Key muscles worked with dips on gymnastic rings
Gymnastic ring dips aren’t just about brute strength—they’re about control, balance, and making every muscle work together. Here’s where they hit the hardest:
🥇 Chest and triceps
The main movers here are your chest and triceps, taking most of the load as you push up and lower yourself with control. On rings, you’re challenging them to work harder with the instability factor.
🥈 Shoulders
Your shoulders are constantly engaged to keep you balanced, which helps build not only strength but also control and durability in the joint. Ring dips help condition your shoulders against strain and instability.
🥉 Core
Your core has to work overtime on the rings. Every rep demands core stability to keep you steady and in control from the moment you lift off to the moment you finish.
“Honorable mention” - Upper back
As you stabilize yourself, your upper back muscles—especially your traps and rhomboids—kick in to support your shoulders and core. It’s a total upper-body challenge that builds functional strength and body control.
Benefits of dips on gymnastic rings for all levels
Whether you’re just starting or have years under your belt, dips on gymnastic rings build real, usable strength that you feel every day.
For beginners: Start with basic holds and assisted dips, building strength and stability in small, manageable steps. Every ring dip activates core stabilizers and develops your muscle control early on.
For intermediate athletes: Adding rings keeps your muscles guessing—every rep tests balance and coordination, firing up your stabilizers to a level fixed bars can’t match. It’s the next step in serious bodyweight training.
For advanced athletes: Mastering ring dips means mastering control. Rings won’t let you cheat—each dip demands full focus and coordination, enhancing your shoulder mobility while building peak strength. Take it further with weighted ring dips or other advanced progressions.
Setting up your rings
Setting up your rings properly sets the foundation for effective training.
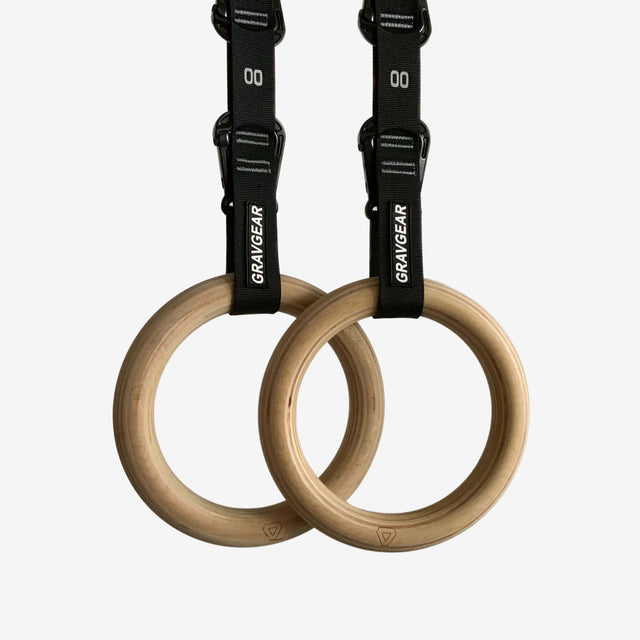
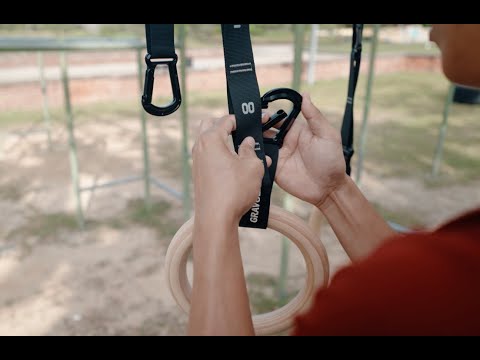
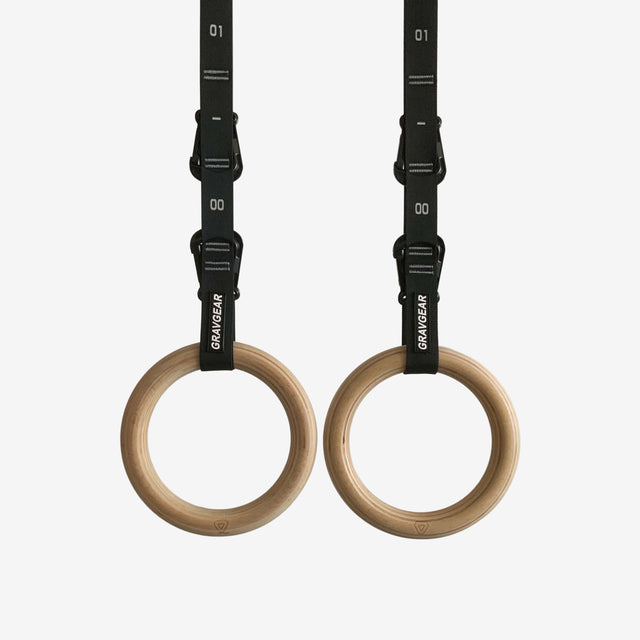
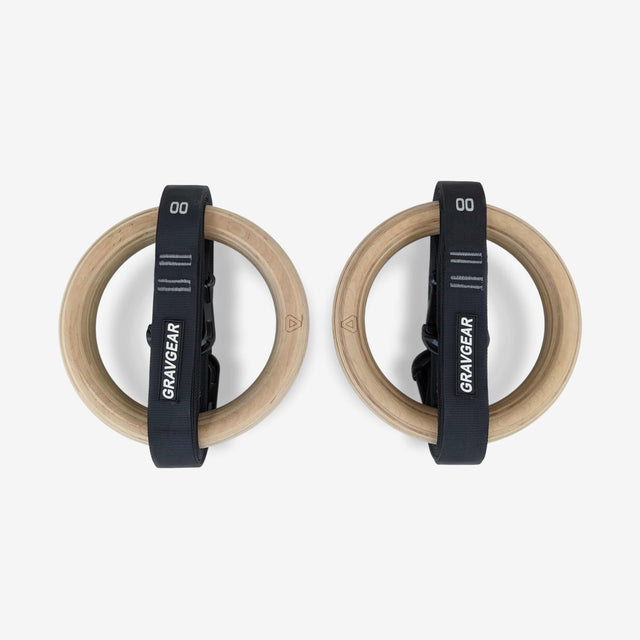
- Find a stable anchor point above head height, like a strong tree branch, pull-up bar, or gym rig, with the rings positioned about shoulder-width apart.
- Adjust the height so your feet clear the ground at the bottom of the dip; if you’re still working on progressions, lower the rings slightly to allow foot support.
- Before jumping in, test the rings to make sure they’re secure, and consider using chalk for grip stability.
For a full setup guide, check out our blog on how to set up gymnastic rings.
Progressions to master gymnastic ring dips
Mastering ring dips begins with solid fundamentals. Progressing through these steps builds the stability and strength needed for effective ring dips.
Support holds for stability
Start with support holds. Set the rings at a height where you can grip them with straight arms, feet off the ground. Hold steady with your shoulders pressed down, core tight, and rings close to your body.
Keep your wrists aligned with the rings. If you feel a bit shaky, that’s good—it means your stabilizers are kicking in.
Aim for a 10–30 second hold. It’s normal to wobble a bit at first. When you can hold steady for 30 seconds, you’re ready to move on.
Negative and assisted ring dips
Next, work on negative ring dips. Begin at the top with arms extended, then slowly lower yourself down. Aim for a controlled 3–5 second descent, building strength through the full range of motion.
If negatives feel too challenging, try assisted dips. Lightly rest your feet on the ground or use a box for support. Reduce the support gradually as you build strength.
Perfecting form for injury-free gymnastic ring dips
Getting the form right is essential to building strength and protecting your joints. Proper alignment in every phase of the movement makes a big difference—both in gains and in injury prevention.
Shoulder & scapula position
Start by setting your shoulders down and back. This “packed” position stabilizes the joints and keeps the right muscles engaged.
As you dip, keep your shoulder blades drawn together, almost like you’re lightly pinching them. This extra stabilization prevents stress on your shoulders and allows for a smoother, controlled descent.
Elbow & wrist alignment
Elbow and wrist alignment is everything. As you dip, aim to keep your elbows moving straight back, not flaring out—this keeps the triceps working while sparing your joints from excess strain.
For the wrists, keep them in line with your forearms. Avoid bending them inward or outward. A straight wrist position maintains grip strength and protects the wrist joint from overstrain.
Leg position & core engagement
Your legs and core are more involved than you might think. Keep your legs slightly forward—no swinging or drifting. Engage your core to lock this position.
A stable core reduces wobbling and distributes the load, letting you focus on upper-body control. Each rep feels more balanced and, ultimately, more effective.
4 Common mistakes & how to fix them
Ring dips are tough, and small mistakes can lead to strain or even injury. Here are some common pitfalls with ring dips—and how to correct them.
1️⃣ Flaring elbows
Flaring elbows is a frequent issue that puts stress on your shoulders and reduces control.
To correct it, keep your elbows tucked close to your body throughout the dip.
Think of guiding them straight back instead of out to the sides. This keeps your triceps engaged and protects your shoulder joints.
2️⃣ Shrugged shoulders
Shrugging shoulders toward your ears is a natural reaction to instability, but it leads to poor form and shoulder discomfort.
Focus on keeping your shoulders down and back as you dip.
Visualize pushing your shoulders away from your ears—this engages your lats and supports your shoulder joints.
3️⃣ Bending wrists
Bent or cocked wrists can lead to pain over time.
Aim for a neutral wrist position in line with your forearms to avoid strain.
A straight wrist distributes force evenly, ensuring a stronger grip and less chance of injury.
4️⃣ Swinging or unstable legs
Swinging legs throw off your balance and make dips harder than they need to be.
Keep your legs slightly forward, and engage your core to hold them steady.
Imagine your body as a solid line from head to toe, moving in one smooth, controlled descent and ascent.
Targeted ring dip training plans for every level
To master gymnastic ring dips, following a structured plan is your recipe for constant gains.
Whether you’re just starting out or an experienced athlete, these targeted programs will help you progress safely and effectively. And at least get you 90% of the way to a killer program after you’ve adapted some areas to your situation where needed.
| Program level | Goals | Exercises | Sets & Reps | Frequency |
| Beginner | Build strength and stability | Support holds: Hold rings with arms straight and shoulders down. | 2–3 sets of 20–30 seconds, increase time as stability improves. | 2 times per week with rest days in between. |
| Negative dips: Start at the top and lower slowly. | 2–3 sets of 3–5 second descents. | 2 times per week with active rest days. | ||
| Intermediate | Add partial & assisted full dips | Partial dips: Lower halfway and push back up. | 3–4 sets of 6–8 reps, focusing on control. | 2 times per week with active rest days. |
| Assisted full dips: Use a box or platform for light support. | 3 sets of 6–8 reps. | 2 times per week with proper recovery. | ||
| Advanced | Full dips, weighted dips & RTO dips | Full dips: Warm-up with standard dips. | 3 sets of 8–12 reps. | 2 times per week with proper recovery. |
| Weighted dips: Use a weight vest or dip belt. | 3–4 sets of 8–12 reps. | 2 times per week with active rest days. | ||
| Ring-turned-out (RTO) dips: Rotate rings outward. | Progress to 3–4 sets of 8–12 reps as comfort increases. | 2 times per week with rest days in between. |
These plans ensure you build strength and stability at each level without overloading your joints.
Customizing ring dips for your body & goals
Ring dips aren’t a one-size-fits-all move. Small adjustments can help you get more from each rep and stay comfortable, depending on your body type and specific goals.
Adjusting for body type
Shoulder width and arm length impact how you should set up.
If you have broader shoulders, try setting the rings just wider than shoulder width to allow natural shoulder movement without added strain. For a narrower frame, bring the rings in closer to reduce joint stress and maintain control.
Experiment with ring width until you find what feels most stable.
For those with longer arms, keeping elbows slightly tucked as you dip can prevent overextension and limit joint strain. Small tweaks like these ensure each dip feels stable and aligned.
Modifying for specific goals
Adjust your form to target different muscle groups and reach specific goals:
- For tricep strength: Keep your body more upright and maintain a close grip. This directs more of the workload to your triceps.
- For chest activation: Lean slightly forward as you dip to engage your chest muscles more fully.
- For shoulder mobility: Prioritize slow, full-range reps with strong form. Going deeper in the dip (within a safe range) will gradually improve shoulder flexibility and control over time.
Customizing ring dips for your body and goals allows you to create a more effective workout, build balanced strength, and avoid unnecessary strain.
Recovery & tendon health for longevity
Ring dips don’t just challenge your muscles—they put real demand on your joints and tendons, too. 🏋️♂️ If you’re aiming for long-term gains, giving recovery its due time is crucial. Tendons strengthen slower than muscles, so they need that extra attention to keep up.
🛌 Prioritize rest & structured recovery
After a ring dip session, give your body a solid 48 hours to recover. This isn’t just about muscles—it’s about allowing your tendons and ligaments to catch up.
If you’re training ring dips more than once a week, alternate heavy days with lighter ones. On lighter days, focus on technique or stick to lower reps to prevent overuse.
🧘♂️ Include mobility work & stretching
Don’t skip mobility work. Shoulder and wrist stretches go a long way in keeping your joints healthy. Try simple stretches, like doorway stretches to open up your chest or band pull-aparts to loosen up your shoulders.
Wrist stretches post-workout are especially useful—ring training takes a toll on them more than you’d think. 💪
👌 Use tendon-friendly progressions
If you’re new to ring dips or ramping up intensity, start with tendon-friendly options like negatives or partial dips. These let your joints adapt gradually to the movement.
Every 4–6 weeks, throw in a “deload week”—reduce reps and weight a bit. This gives tendons a break and keeps overuse injuries at bay.
Advanced variations for seasoned athletes
Ready to take your ring dips to the next level? Once you’ve built up control and strength with standard ring dips, advanced variations add new challenges that elevate your training.💪
But fair warning—these moves demand serious strength and stability, so they’re best for experienced athletes.
Weighted ring dips
Adding weight amps up the intensity. Weighted ring dips push your chest, shoulders, and triceps to new limits, building pure power. Use a weight vest or dip belt with plates for added resistance.
Start light. Aim for 3–4 sets of 4–6 reps, focusing on control with each dip.
Weighted dips let you target muscle growth and strength without adding extra reps—ideal for those looking to pack on serious upper body mass.
Ring-turned-out (RTO) dips
RTO dips crank up the challenge by turning the rings outward.
This extra instability means your muscles have to work even harder to stay balanced. It’s tough on the shoulders, so practice RTO support holds first to master the position.
When ready, go for 2–3 sets of 4–5 reps, focusing on stability from start to finish. RTO dips boost shoulder stability, making them a powerful addition for advanced athletes.
Archer ring dips
Archer ring dips are all about unilateral strength and control, shifting weight onto one side at a time.
Start at the top with both arms straight, then lower down, extending one arm out to the side while the other stays bent to support your weight.
Alternate sides each rep, aiming for 2–3 sets of 3–5 reps per side.
Archer dips train strength and coordination across your entire upper body, giving you balanced power.
Ring dips vs. other exercises
Ring dips are one of a kind, but how do they measure up against other go-to moves like bar dips, push-ups, and bench presses? Each has unique perks, so your choice depends on your goals and how you like to train.
Ring dips vs. bar dips
Both exercises target the chest, triceps, and shoulders, but that’s where the similarities end. Bar dips offer a fixed path, which makes them easier to control and great for high-rep work. Ring dips, though, bring the challenge of instability, activating stabilizer muscles in your shoulders, chest, and core.
Looking for functional strength? Ring dips add an extra level that bar dips don’t.
Ring dips vs. push-ups
Push-ups are accessible and great for volume, building chest, shoulder, and core strength. But they lack the full range of motion and instability of ring dips. For beginners, push-ups are ideal to build a foundation. For advanced athletes, ring dips give a more intense challenge that works the deep stabilizers and upper body control.
Ready for more than basic bodyweight? Ring dips deliver on the extra challenge.
Ring dips vs. bench press
The bench press is a classic for building upper body mass and strength. Heavyweights and a fixed bar path make it effective for targeting the chest and triceps. But bench presses miss the functional stability component of ring dips. With ring dips, you get joint control, balance, and core engagement that translates to real-life movement, while bench presses are all about raw pushing power.
4 Ways to track your progress and stay motivated
1. Set measurable goals
Start with specific, achievable targets: hold a 30-second support position, complete five solid ring dips, or work up to weighted dips. Each small win is progress toward mastering ring dips and keeps you moving forward.
2. Keep a workout log
After each session, jot down your reps, sets, and any variations you tackled. Over time, you’ll start to see patterns—maybe your holds are steadier or your reps come easier. A workout log keeps you accountable and shows you just how far you’ve come.
3. Test your stability & form
Tracking progress isn’t just about reps. Pay attention to improvements in control—reduced wobbling, better depth, and overall steadiness. Every gain in stability is a sign your body is adapting and building real strength.
4. Celebrate milestones
Whether it’s your first unassisted dip or holding a negative dip descent for 3 seconds, mark each win. These achievements are proof of your hard work and show you’re moving in the right direction.
FAQs
Ring dips can be challenging, especially when you’re first getting started.
Here are some of the most frequently asked questions and common troubleshooting tips to help you overcome obstacles and keep progressing.
Why am I shaking so much during ring dips?
Shaking is completely normal with ring dips—it means your stabilizer muscles are kicking in to keep you balanced. Over time, this will ease as your strength and control improve. Focus on consistent support holds and work through negative reps to build stability.
How deep should I go in a ring dip?
Aim to lower yourself until your elbows hit about a 90-degree angle. If you’re more flexible, you can go a bit deeper, but avoid pushing past a comfortable range to protect your shoulders. Progress gradually to increase depth without strain.
What if I feel pain in my wrists or shoulders?
Pain often means something’s off with form or flexibility. Keep your wrists straight, aligned with your forearms, and maintain a “packed” shoulder position (down and back) to reduce strain. Adding wrist and shoulder stretches to your warm-up can also help.
How can I stop the rings from rubbing my forearms?
To avoid strap rub, try rotating your wrists slightly outward as you lower. This external rotation shifts your elbows back, keeping your arms away from the straps for a more natural, comfortable path.
Why can’t I do a full dip yet?
Try support holds, negatives, and assisted dips to build strength in stages. These progressions prepare your joints and muscles for full dips without rushing.
How often should I train ring dips?
Beginners can aim for 2–3 sessions per week, with rest days in between. As you get stronger, adjust your frequency based on recovery—just don’t sacrifice rest for more sessions.
When in doubt…
Refer back to these FAQs to troubleshoot issues and stay on track with your ring dip journey.
Wrapping up
Mastering gymnastic ring dips is a journey that builds real, functional strength, with benefits that go far beyond the gym. Each rep on the rings boosts your stability, control, and muscle engagement in ways traditional exercises can’t match.
Remember, progress takes time.
Start with support holds, work through negatives, and celebrate every small gain along the way.
With consistent training, smart recovery, and focus on form, you’re setting yourself up for lasting strength and injury-free training.
Want tips, advice, and a community to keep you motivated? Join the Gravgear Telegram group and connect with others on their strength journey.
And if this guide helped you, share it with friends or your training group—drop the link in your DMs or group chat to help others level up too 💪😎
Keep tracking your wins, stay focused, and don’t rush the process. Each step brings you closer to mastering this powerful move.
Strong is strong, now let’s go get it!




0 Comments
There are no comments for this article. Be the first one to leave a message!