Simple Steps to Perfect Your Gymnastic Rings Rows
Gymnastic ring rows bring the power and control you need to build upper body strength and rock-solid core stability, even in a small space. The instability of rings cranks up muscle engagement, recruiting stabilizers you never knew you had. Adjust your angle and grip to make these rows humbling for a beginner or a solid challenge for the advanced athlete. These rows are all about strength, durability, and keeping your body in line without fancy equipment. It’s a simple, rugged way to add depth to your training, whether you're at home, at the park, or deep in the bush.
Just like the bush, we’ll dive deep into these topics:
- What are gymnastic ring rows?
- Why ring rows stand out
- Target muscles & benefits
- 5 common problems with ring rows (& how to overcome them)
- Ring rows step-by-step
- Ring rows for every skill level
- Optimal gymnastic rings rows grip
- Push/pull/legs rings-based workout routine
- Comparing gymnastic ring rows to other rowing exercises
- Injury prevention & safety tips for long-term training
- 3 Additional variations for advanced progressions
- FAQ
What are gymnastic ring rows?
Gymnastic ring rows are a no-nonsense bodyweight move that builds serious pulling power by making you pull your own weight toward a set of rings. Unlike fixed bars that lock you in place, rings keep you on your toes—or rather, on your stabilizers—with every rep. This builds the kind of strength that doesn’t just show up in pull-ups but kicks in wherever you need real muscle control.
Why ring rows stand out
Some people look at ring rows as a “beginner step” to pull-ups. But they’re dead wrong. Ring rows are a powerhouse exercise all on their own. Working on the horizontal plane, they hit stabilizers that most workouts miss, balancing your strength and bulletproofing your shoulders and core. Done right, they don’t just build muscle—they build resilience.
Target muscles & benefits
Ring rows are all about those hard-hitting muscles like the lats, rhomboids, and rear deltoids—the core muscles behind a powerful pull and rock-solid posture. They also target the spinal erectors along your back, stabilizing your spine, and fire up your core to keep your body steady through each pull. This isn’t just muscle for show—it’s strength that keeps you moving right.
Tip: Lats (latissimus dorsi) run along the sides of your back, powering any shoulder and arm pull. Rhomboids sit between your shoulder blades, keeping your shoulders locked in place. Spinal erectors are the muscles lining your spine, supporting rock-solid posture.
5 Common problems with ring rows (& how to overcome them)
1️⃣ Protraction vs. retraction
One of the biggest mistakes in ring rows is unclear scapula positioning. Here’s the key: retract your scapula (pull your shoulder blades back and down) on each pull, then allow slight protraction (shoulder blades widening apart) as you lower. This keeps your shoulders safe, prevents strain, and maximizes muscle activation.
Tip: Retracting the scapula means pulling the shoulder blades together. This stabilizes your shoulders and hits your back harder.
2️⃣ Range of motion issues
Struggling to pull the rings all the way to your chest? Start by positioning your feet closer to the anchor point, reducing the angle, and keep pulling until the rings hit your chest. Once that feels solid, move your feet out to ramp up the challenge. This builds strength without cutting corners on form.
3️⃣ Muscle fatigue
It’s common to feel your biceps, forearms, and shoulders burn out, especially if you’re new to ring rows. To cut down on strain, keep your wrists neutral (not bent) and your elbows tucked in close. Stick to rest intervals—60 seconds for beginners, 50 seconds for intermediates, and 40 seconds for advanced—so you’re managing fatigue and staying sharp between sets.
4️⃣ Preventing joint strain & tendinitis
Improper form can put stress on your shoulder and elbow joints, which nobody wants. Start with a controlled tempo (try 4-1-2-0) so you’re easing into each rep instead of jolting your joints. Engage your core and keep your elbows from flaring to stay rock-solid and joint-friendly.
5️⃣ Ring security
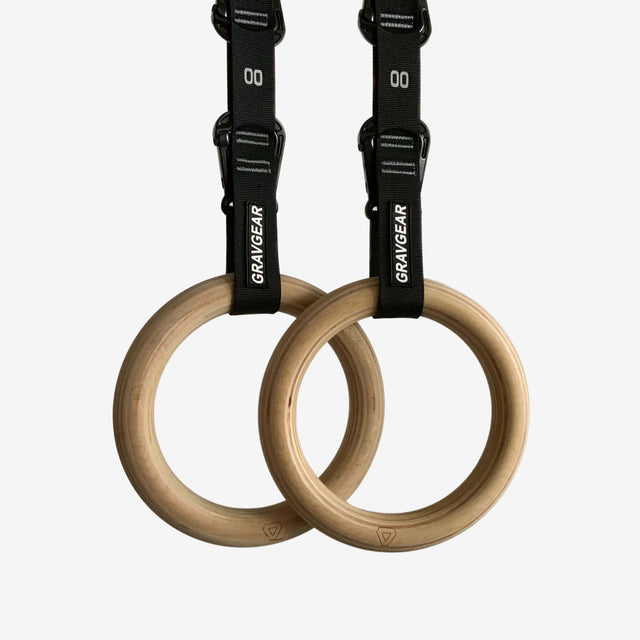
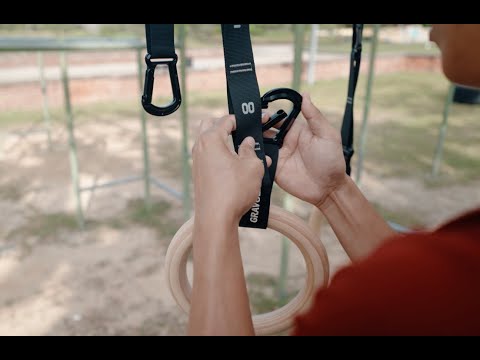
Setting up rings at home? Safety has to be rock-solid. Anchor them on something strong—a door frame, ceiling beam, or rack that’s not going anywhere. Check that the straps are locked in and can handle your weight without a slip. Once you’ve got a solid setup, you can focus on getting after it.
Tip: Make sure your anchor point can hold at least twice your body weight to avoid any surprises.
Ring rows step-by-step
Mastering ring rows is about nailing the setup, maintaining control, and following precise form. Here’s how to make each rep count.
Step ☝️ Set up for stability
- Adjust the rings: Set your rings to hang about waist-high. For beginners, start with the rings slightly higher to reduce difficulty. As you progress, lowering the rings adds challenge.
- Position your feet: Face the rings, feet hip-width apart. Step forward until your body forms a straight line from head to heels, leaning back slightly. The closer your feet are to the anchor point, the harder the row.
- Grip firmly: Hold the rings with a neutral grip (palms facing each other), squeezing the handles tightly to stabilize.
Quick tip: Align the rings with your shoulders. Keep them parallel, not too wide or narrow, to protect your shoulder joints.
Step ✌️ Engage your core
- Lock in your posture: Brace your core as if you’re preparing for a hit. Squeeze your glutes and keep your hips level to avoid sagging. This maintains a stable “plank” from shoulders to ankles.
- Maintain shoulder position: Set your shoulder blades back and down to create a strong base for the row. This small adjustment protects your shoulders and activates your back muscles properly.
Form cue: Think “brace” for your core and glutes—hold tight to keep your spine aligned through each pull.
Step 🤟 Execute the row
- Pull with your back: Begin by retracting your shoulder blades (pulling them back and together) before bending your elbows. This engages the lats and upper back.
- Bring the rings to your chest: Pull until the rings touch your chest, keeping elbows close to your body—no flaring. This alignment maximizes back engagement while keeping your shoulders safe.
- Control the descent: Lower back to the starting position slowly. Aim for a 4-1-2-0 tempo: take 4 seconds to lower, 1-second pause at the bottom, 2 seconds to pull up, and no pause at the top.
Tip: Focusing on tempo (4-1-2-0) keeps each muscle under tension, especially on the way down, building more strength and control.
Common mistakes to avoid
❌ Elbow flaring
Flaring elbows shift strain from your back to your shoulders, increasing injury risk. Keep elbows tucked close to your body to hit your back muscles effectively.
❌ Sagging hips
When hips drop, your form breaks, and you lose stability. Keep your core and glutes engaged to hold a straight line from head to heels, preventing low-back strain.
❌ Rushing through reps
Rushing sacrifices control and muscle engagement. Stick to the 4-1-2-0 tempo to keep tension throughout each phase of the movement and avoid “cheating” through your reps.
Ring rows for every skill level
Ring rows can be tailored to any level, from beginner to advanced, with simple adjustments to body angle and foot position. Each level increases the load on specific muscles, making it easy to progress as you build strength.
Beginner | Standing farther from the anchor
Start by positioning your feet farther from the anchor point, so your body angle is closer to vertical. This setup reduces the load, making it easier to control the movement and nail your form.
Muscle engagement: In this position, most of the load stays in the upper back and shoulders, with a lighter demand on the lats. It’s ideal for learning proper scapula retraction and core engagement without overloading.
Intermediate | Moving feet closer to the anchor
As you get stronger, step your feet closer to the anchor. This shifts your body angle to more of a diagonal line, which increases the resistance and demands greater control.
Muscle engagement: Here, the load on the lats, rhomboids, and rear deltoids increases. Your core and glutes will also work harder to stabilize the position, especially as the body angle lowers.
Advanced | Feet-elevated, near-horizontal position
For advanced ring rows, elevate your feet so your body is nearly horizontal. You can use a bench, sturdy box, or low bar to lift your feet. This setup maximizes resistance, challenging your back and core to maintain alignment against gravity.
Muscle engagement: In this position, the load on the lats, rhomboids, and spinal erectors is at its peak, and the core is fully engaged to keep your body stable. It’s a serious test of full-body control and upper back strength.
Optimal gymnastic rings rows grip
| Adjustment | Variation | Muscle Engagement | Tips |
| Hand Placement | Higher (near chest) | Targets upper back and traps, aiding shoulder stability | Adjusting hand height lets you isolate specific muscle groups without changing the full setup. |
| Lower (near waist) | Focuses on lower lats and mid-back | Use lower placement for a stronger back emphasis. | |
| Elbow Positioning | Elbows close to body (30°) | Maximizes lat engagement, reduces shoulder strain | Tuck elbows slightly to avoid shoulder strain and engage the back. |
| Elbows flared outward (>45°) | Shifts strain to shoulders, reducing back activation | Keep elbows close to stay safe and get more out of each pull. | |
| Grip Variations | Neutral grip | Balanced, natural grip for control and comfort | Ideal for beginners; keeps wrists neutral, reducing strain. |
| False grip (thumbs over top) | Builds forearm and wrist strength for advanced moves | Start with short sets to build endurance for moves like muscle-ups. | |
| Straight wrists | Avoids extra wrist strain | Maintaining straight wrists is key for advanced or heavier sets. |
Push/pull/legs rings-based workout routine
This routine is set up for a solid push-pull-legs split, a structure that balances power, stability, and control in every workout. It’s designed to help you move up from beginner to advanced without fuss. Easy to follow, harder to master—just the way it should be.
Weekly workout plan: push-pull-legs split
| Day | Focus | Exercise | Sets x reps | Time under tension | Rest |
| Monday | Pull | Ring rows (beginner: feet far from anchor) | Beginners: 3 x 8-12 | Tempo: 4-1-2-0 | Beginners: 60s |
| Face pulls with rings (beginner: standing upright) | Intermediates: 4 x 8-12 | Intermediates: 50s | |||
| Advanced: 5 x 8-12 | Advanced: 40s | ||||
| Core | Plank holds on rings (isometric hold) | 3 x 40-60 sec (beginner) | N/A (Static hold) | Rest: 60s/50s/40s | |
| Tuesday | Push | Ring push-ups (beginner: hands high, feet close) | 3-5 x 8-12 | Tempo: 4-1-2-0 | 60s/50s/40s |
| Ring dips (beginner: feet on ground) | 3-5 x 8-12 | ||||
| Core | Ring knee raises | 3 x 10-12 | Tempo: 4-1-2-0 | 60s/50s/40s | |
| Wednesday | Legs | Bulgarian split squats (holding rings) | 3-5 x 8-12 per leg | Tempo: 4-1-2-0 | 60s/50s/40s |
| Ring-assisted pistol squats (beginner level) | 3-5 x 8-12 per leg | ||||
| Core | Side plank holds on rings | 3 x 30-45 sec per side | N/A (Static hold) | 60s/50s/40s | |
| Thursday | Rest / active recovery | Light stretching, mobility work, or a casual walk | N/A | N/A | N/A |
| Friday | Pull | Ring rows (intermediate: feet closer to anchor) | 3-5 x 8-12 | Tempo: 4-1-2-0 | 60s/50s/40s |
| Reverse ring flies (intermediate) | 3-5 x 8-12 | ||||
| Core | Ring tuck holds | 3 x 20-30 sec | N/A (Static hold) | 60s/50s/40s | |
| Saturday | Push | Ring push-ups (intermediate: parallel to floor) | 3-5 x 8-12 | Tempo: 4-1-2-0 | 60s/50s/40s |
| Ring dips (intermediate: feet elevated) | 3-5 x 8-12 | ||||
| Core | Ring sit-ups | 3 x 10-12 | Tempo: 4-1-2-0 | 60s/50s/40s | |
| Sunday | Abs only | Ring knee raises, side planks, ring sit-ups | 3 x 10-12 (each) | Tempo for raises/sit-ups; Static hold for planks | 60s/50s/40s |
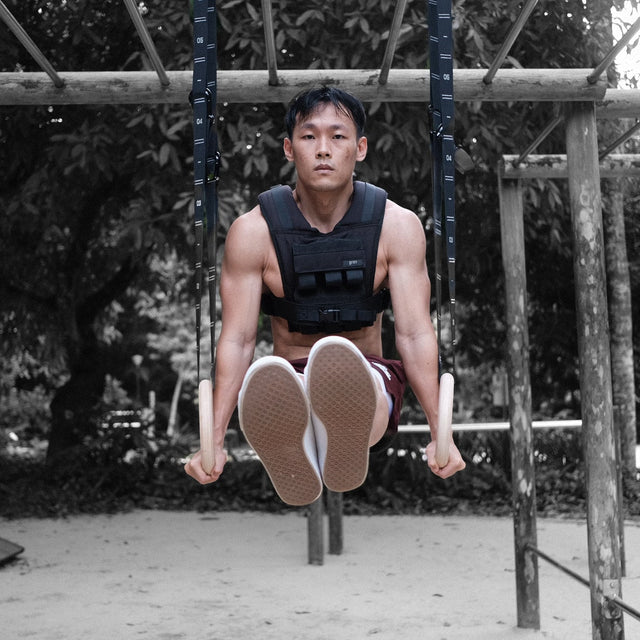
Heads up: If 12 reps feel too easy, it’s time to level up. Use a weight vest or shift to a harder variation. Stick to a 4-1-2-0 tempo for non-static moves—time under tension builds strength.
Progression guide: moving up the ranks
👶 Beginner level
- Ring rows: Keep feet far from the anchor to reduce load.
- Ring push-ups: Hands high on rings, feet close for easier movement.
- Ring-assisted squats: Use rings for balance in split squats and pistol squats.
👦 Intermediate level
- Ring rows: Move feet closer to the anchor to amp up the resistance.
- Ring push-ups: Hands level with the floor for standard push-up resistance.
- Pistol squats: Keep using the rings for stability, aiming for depth and control.
👨 Advanced level
- Ring rows: Elevate feet on a bench or box for more load on the upper back.
- Single-arm rows: Shift to single-arm rows for more core and stability work.
- Single-arm ring push-ups: Progress to single-arm push-ups to challenge balance and core.
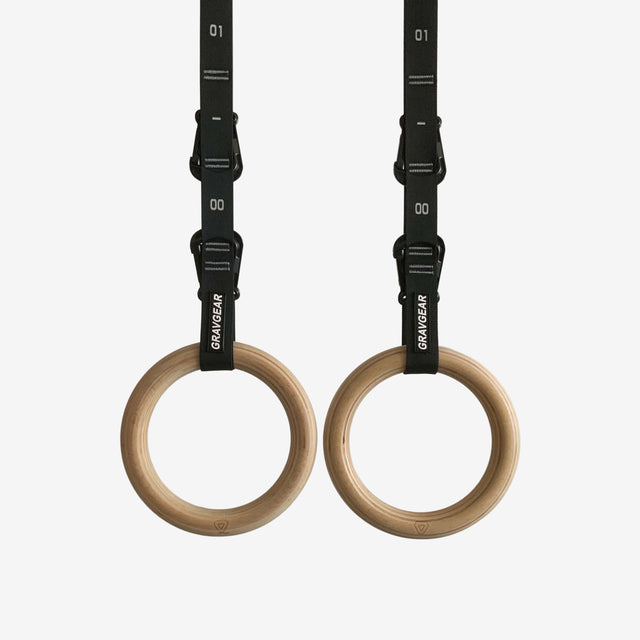
Training tip: Keep those rings rock solid and level. Adjust quickly and cleanly before each exercise to maintain a smooth workout flow—no wasting time with straps slipping out of place.
Comparing gymnastic ring rows to other rowing exercises
| Exercise | Stability & difficulty | Versatility & control | Muscle activation |
| Gymnastic ring rows | Moderate to high; stability demands increase with body angle and foot position. | Most versatile; adjust angle, grip, and position for targeted engagement | High core and stabilizer activation; hits upper back, lats, traps, and core extensively |
| TRX rows | Moderate; straps offer a bit more stability than rings | Versatile, but fixed handles limit control options | Engages core and upper back but less stabilizer recruitment than rings |
| Barbell rows | High stability; bar provides fixed, controlled path | Limited versatility; requires a loaded bar | Upper back, traps, and lats focus, but minimal core and stabilizer work |
| Pull-ups | High; requires significant upper body strength | Fixed bar limits grip options, less versatile | Primary activation in lats and upper back; less core and stabilizer work compared to rings |
Pros & cons of gymnastic ring rows
Pros
- Improved core stability: Rings demand core engagement throughout each rep, which builds balanced strength across the upper body and core.
- Natural, flexible movement: With rings, you can adjust your grip and elbow position naturally to reduce wrist strain and better activate target muscles.
- Easily progressive: Rings allow quick modifications in body angle to adjust difficulty, making them a go-to for gradual strength building at all levels.
Cons
- Higher stability requirement: Ring rows require more focus and control than fixed equipment—beginners may find it challenging to keep the rings steady without practice.
- Secure setup needed: Rings must be anchored to a solid structure that can handle your weight and prevent slipping or instability.
- No added load: Bodyweight limits resistance; advanced users may need a weight vest or one-arm rows for further progression.
Injury prevention & safety tips for long-term training
Staying injury-free is essential to keep progressing.
Consistency is key, but it only works if your body is prepared for the journey.
Here’s how to build lasting resilience with gymnastic ring rows…
Prioritize joint health
Gymnastic ring rows are powerful for upper body strength, but they place extra demand on the shoulders and elbows. Avoiding overuse injuries starts with precise form, especially when it comes to joint alignment.
Keep your wrists straight, elbows tucked close to your body, and shoulders pulled down and back.
This positioning keeps pressure off your joints and makes sure your back muscles carry the load, not your shoulders.
Rest days are just as important as workout days. Rotate in lighter sessions when needed, giving your shoulders and elbows time to recover—especially as you increase reps or progress to harder variations.
Listen to your body. Sharp pain or fatigue in a joint is your cue to reassess your form or take a break.
Building strength is a marathon, not a sprint.
Warm-up tips for shoulders and stability
A quick, targeted warm-up goes a long way. Shoulder mobility and stability drills are essential to prime the muscles and protect your joints.
Try arm circles, banded pull-aparts, and scapular retractions to activate the shoulder girdle and keep the scapula stable.
Five minutes of focused mobility work can make all the difference, especially as you level up to tougher moves.
Warm-ups aren’t just for injury prevention—they prepare your body to perform. When your shoulders are ready, they engage fully in the movement, activating the right muscles and keeping unnecessary strain off the joints.
Quick safety check
Before each session, run through these safety essentials to keep joints protected and form sharp:
- Wrist alignment: Keep wrists straight to avoid strain.
- Elbow position: Tuck elbows close to engage the back and reduce shoulder load.
- Core engagement: Tighten your core to stabilize the body.
- Scapula retraction: Pull shoulders slightly back and down to protect shoulder joints.
- Anchor point: Ensure rings are securely attached to a stable, weight-bearing structure.
Tip: Treat this checklist as your “pre-flight” safety check—taking a moment to run through these points can make all the difference in longevity and results.
Form cues for sustainable training
Good form isn’t just about performance. It’s about safety, especially when you’re working with rings. Use a controlled 4-1-2-0 tempo (4 seconds lowering, 1-second pause, 2 seconds lifting, no pause at the top) to keep muscles engaged and avoid sudden, risky movements.
Each pull should be smooth and intentional.
Rushing through reps sacrifices control, stability, and long-term progress.
Mindful progression is everything. Increase difficulty gradually, focusing on mastering one level before moving on. Pay close attention to scapula positioning, keeping a slight retraction (shoulder blades back) on each rep to minimize shoulder strain and maximize back engagement.
This lets your back do the work.
And it protects your shoulders for the long haul.
Building sustainable strength requires patience, focus, and respect for your body’s limits. When every rep is a step toward resilience, you’re building results that last—injury-free.
3 Additional variations for advanced progressions
Once you’ve nailed standard ring rows, these advanced variations add new challenges, increase engagement, and build serious strength. Each move targets specific goals, helping you progress with control and confidence.
1 - Tempo rows
Slowing down your reps increases time under tension and demands total focus. Try a 4-0-4-4 tempo: 4 seconds lowering, no pause at the bottom, 4 seconds pulling up, and 4 seconds pause at the top.
How to do it
Start from a stable position, lower yourself in 4 seconds, hold 0 second at the bottom, then take 4 seconds to pull back up, hold for 4 seconds, repeat.
Why it works
This tempo forces muscles to stay fully engaged, especially in the descent. You’ll build endurance and stability with each controlled rep.
2 - False grip rows
False-grip rows are all about wrist strength and forearm endurance. This grip places your wrists over the rings, a key setup for advanced skills like muscle-ups.
How to do it
Wrap your wrists over the rings instead of gripping from below. Focus on keeping wrists bent and engaged.
Why it works
The false grip strengthens your grip and stabilizes the wrists, critical for transitioning into moves that demand explosive pulling power.
3 - Single arm rows
Single-arm rows test your balance and stability, requiring intense core engagement to prevent rotation. This exercise improves unilateral strength (strength on each side independently), which corrects imbalances and boosts control.
How to do it
Keep your free arm close to your body or across your chest. Focus on pulling smoothly and keeping your body steady.
Why it works
Training one arm at a time forces your core to stabilize without twisting. It’s an effective way to build full-body stability and target any strength imbalances.
Set your base for muscle-ups & levers
Ring rows are the foundation for advanced power moves, including muscle-ups and front and back levers. With the core and upper-body stability you develop in rows, you’ll build the base strength these moves demand.
Muscle-ups
Prepping for muscle-ups
Work on false-grip rows while gradually pulling the rings closer to your waist. This helps build explosive pulling power and prepares the wrists for muscle-up mechanics.
Why it’s effective
Muscle-ups require both raw strength and smooth transitions—false-grip rows set you up for both.
Front and back levers
Prepping for levers
Hold the top position of each row, focusing on keeping your scapula (shoulder blades) retracted and core tight. This trains stability, shoulder alignment, and control, which are essential for lever work.
Why it’s effective
Levers require complete body control. Rows develop this control by teaching you to hold a solid form under tension.
FAQ
Got questions about gymnastic ring rows? Here are some quick answers to set you up for solid gains, confident form, and a training journey that’s safe and strong.
Can ring rows replace pull-ups for strength?
Ring rows build serious upper body strength, especially in the back and core, but they’re not a direct replacement for pull-ups. Think of them as a power move in their own right. Rows and pull-ups each target different angles—horizontal pulling with rows, vertical with pull-ups—and together, they cover your bases for a complete upper body workout. So, include both if you can, but know ring rows alone are solid for building strength that sticks.
How do I avoid shoulder strain?
Shoulder strain often creeps in with poor alignment or rushing through reps. Start each rep by locking in with a 4-1-2-0 tempo (4 seconds lowering, 1-second pause at the bottom, 2 seconds pulling up, no pause at the top). This controlled tempo keeps your movements clean and steady. Tuck your elbows close, pull your shoulders down and back, and always warm up those shoulders with moves like scapular retractions and banded pull-aparts. Your shoulders will thank you for it.
Can I build muscle mass with rings?
Absolutely, especially if you push through tougher variations. The key to muscle gains on rings is time under tension—controlled reps with steady progressions. Start with basics, then advance to single-arm rows or add a weight vest for an extra challenge. Rings have that “double whammy” effect, hitting stabilizers and big muscle groups alike, which leads to strength and muscle growth you can see and feel.
What’s the best way to keep progressing with ring rows?
Experiment. Change up angles, try different grips, and add tempos to keep challenging your muscles. Moving your feet closer to the anchor increases difficulty, while a false grip strengthens your wrists for more advanced moves. Focus on controlled progression—stick to one change at a time and master it before moving on. Ring rows have an incredible range, so make the most of it by testing out what works for your goals.
How soon can I expect results?
Stay consistent, and you’ll start to feel and see changes in a few weeks. With mindful practice, ring rows build a lasting foundation of muscle and resilience. Long-term gains come from steady progression and focused form. Stick with it, challenge yourself, and trust the process. You’ll get results that last.
Final thoughts
Each rep tests your control, challenges your stability, and builds a level of functional strength that you feel in every movement.
The rings force your core to work overtime. They keep you steady, aligned, and fully engaged from shoulders to hips, making every row a full-body effort.
And with rings, you’re not locked into one path.
You control the angle. Adjust the grip. Set the tempo. Each choice changes the focus and forces your body to adapt.
That’s where the magic happens.
As you progress, the challenge grows with you.
From beginners building the basics to seasoned athletes refining precision, there’s always room to level up.
Every time you tweak the setup (moving your feet, adding a false grip, slowing down your tempo) you’re setting a new standard for your body to reach.
Commit to mastering the fundamentals.
Make each rep intentional.
If this helped you out, feel free to drop a comment below, join our Gravgear telegram channel with over 3k+ members, and link this blog to your gym bros and calisthenics comrades.


0 Comments
There are no comments for this article. Be the first one to leave a message!