Train for Iron Cross Rings Gymnastics in 4 SIMPLE STEPS
So, you’re eyeing the iron cross. That brutal, unforgiving move that’ll humble you quicker than you can say “mate.” This isn’t just another skill on the gymnastics rings—it’s the ultimate test of grit and precision. Pulling off the iron cross is about more than raw strength. It’s control, discipline, and bloody patience, mate. You’ll need it all to get from square one to mastery.
This guide’s your roadmap, built for anyone serious about smashing their iron cross goals. We’re talking step-by-step progression, injury prevention tips, and the mental game you’ll need to stay in it for the long haul. And let’s get one thing straight—this isn’t bodybuilding. Gymnastic training hits different; it’s strength for real-world performance, not just aesthetics. We’re covering it all, so you’re not just going through the motions—you’re training smart, safe, and solidly built to last.
You’ll walk away with the tools, the know-how, and the mindset to take on the iron cross:
- Understanding the iron cross
- Prerequisites & foundational strength
- Body mechanics & form essentials for the iron cross
- Injury prevention
- Step-by-step training progression & 4 Phases of goals
- Perfecting form & technique
- Tools & gear for iron cross training
- Psychological & motivational strategies for long-term training goals
- Functional vs. aesthetic training
- Special considerations for older athletes
- Your iron cross come-up story starts TODAY 💨🏃♂️➡️
Understanding the iron cross
Let’s get one thing straight—the iron cross is no casual workout move. This beast sits up at level 10 in the gymnastics world, reserved for those with serious grit and an elite strength-to-weight ratio. We're talking about a skill that’ll demand everything from your upper body. If you want to master it, you need more than just muscle—you need finesse, commitment, and patience by the truckload.
Why the iron cross stands out
Think of the iron cross as the “Everest” of gymnastic rings. This isn’t just a show of brute force; it’s about executing a position where every ounce of your body is locked into perfect alignment. Your arms are extended straight out from your sides, holding your body still as if you’re a statue. Achieving this requires precise form, tendon and ligament strength, and the patience of a saint. Mastery doesn’t come in months—it comes in years. Realistically, you’re looking at 1-4 years of hard, disciplined training to get it right.
Common myths
The iron cross isn’t just about bulking up or hitting a few new PRs. Plenty of strong blokes hit the rings thinking they can muscle their way into the cross, only to find themselves humbled fast. Sure, strength is needed, but here’s the real kicker: without tendon conditioning and ligament strength, you’re setting yourself up for failure—or worse, injury. This move demands more from your connective tissues than any curl or press could ever prepare you for. Tendons and ligaments adapt slower than muscles, so rushing in without solid prehab and conditioning will leave you sidelined.
The mental game
Here’s the truth: the iron cross will test your patience as much as your strength. You’ll hit plateaus, feel your form slipping, and face days where you wonder if you’ll ever get there. That’s normal. This skill is as much mental as it is physical. Staying committed through the slow progress, the tweaks to form, and the long stretches of tendon strengthening is half the battle. This is a grind, mate—respect the process, and you’ll get there.
Prerequisite checklist
Before you even start chasing the iron cross, make sure you’re ticking off these boxes. These are foundational moves that will help you build the control, strength, and stability needed to even think about the cross.
✅ Planches
A solid planche builds straight-arm strength and core stability, both needs for the iron cross.
✅ Muscle-ups
Mastering a controlled muscle-up shows you’ve got the upper body pulling and pushing strength for more advanced skills.
✅Hollow body holds
This is your core’s foundation. If you can’t hold a clean, stable hollow body, the cross is out of reach.
Use this list as a readiness gauge. If you’re not there yet, start building these moves into your routine. Nail them down, and you’ll have the foundation you need to start your journey toward mastering the iron cross.
Prerequisites & foundational strength
If you’re aiming to conquer the iron cross, don’t just dive in cold. This skill demands a rock-solid base—a trifecta of strength, stability, and durability across your upper body. Think of this section as your blueprint for success, giving you the structure to build up and prevent breakdowns. We’re not just looking at muscle here; we’re talking tendon resilience, joint stability, and the grit to see it through.
Why building blocks matter
Just like building a house, every advanced skill starts with a foundation. Skipping these steps? Not an option, mate. Rushing into iron cross training without the basics is like paddling out without a surfboard. You need straight-arm strength, shoulder stability, and core control. Training these areas with precision is what will keep you in the game long-term.
Target strength goals
Use these checkpoints as your “ready or not” gauge:
- Pull-up strength: Get to 1.5x bodyweight for strict form pull-ups.
- Dip strength: Aim for 2x bodyweight dips with smooth control.
- Straight-arm stability: Hold a support position for 10-15 seconds solid.
These are your early tests—hit these numbers and you’ll have the control needed to jump to the next level.
3 Foundational exercises
Each exercise below builds one of the critical skills required for the iron cross. Let’s break it down, mate:
Support holds
- Hold time: Beginners aim for 40-60 seconds, intermediates 50-70 seconds, advanced 60-80 seconds.
- Purpose: Teaches core stability and arm strength. Get comfy holding a steady position with no give.
- Next step: Once you hit 80 seconds comfortably, consider adding a weighted vest or moving up to a harder variation.
Ring push-ups
- Sets: 3 for beginners, 4 for intermediates, 5 for advanced.
- Reps: 8-12 reps (add weight if 12 reps get easy).
- Tempo: 4-1-2-0.
- Rest: Beginners 60 seconds, intermediates 50 seconds, advanced 40 seconds.
- Progression: Scale it up if you’re breezing through; these need to challenge you every time.
Shoulder presses
- Sets: 3 for beginners, 4 for intermediates, 5 for advanced.
- Reps: 8-12 reps.
- Tempo: 4-1-2-0.
- Rest: Beginners 60 seconds, intermediates 50 seconds, advanced 40 seconds.
- Challenge: Add weighted presses once you’ve mastered form to ramp up difficulty.
Prehab – Building “bombproof” joints & tendons
When it comes to serious skill work, prehab is the name of the game. Tendons, ligaments, and joints aren’t as quick to adapt as muscles, so don’t cut corners here. Building up these areas with exercises like scapula push-ups and resistance band work is your insurance policy.
Scapula push-ups
- Sets: 3 across all levels.
- Reps: 8-12 reps.
- Tempo: 4-1-2-0.
- Rest: Beginners 60 seconds, intermediates 50 seconds, advanced 40 seconds.
- Purpose: Keeps your shoulder stabilizers solid, critical for injury prevention.
Resistance band work
- Focus: Dynamic shoulder and arm exercises with bands, crucial for tendon resilience and mobility.
- Description: Improve shoulder health and prep your arms for the unique demands of the iron cross.
Wrist mobility drills
- Frequency: Daily before workouts.
- Goal: Keeps wrists mobile and durable to handle high loads, helping you avoid common strains.
Training split: Push, pull & legs
The best training split for this foundation is a “push, pull, legs” setup, with abs every other day to keep the core sharp without overdoing it.
- Push days: Hit shoulder presses and ring push-ups.
- Pull days: Target pull-ups, support holds, and scapular work.
- Leg days: Train legs with lower intensity to keep the upper body fresh.
Abs routine
Train abs Sunday, Tuesday, and Thursday with two core exercises on push or pull days and a core-only session on Sunday. This keeps your core strong and recovery in check. This setup will get you building the habit, consistency, and rock-solid foundation you need to take on the iron cross.
Body mechanics & form essentials for the iron cross
To pull off the iron cross, strength alone won’t cut it. This is where form becomes your best mate, locking you into a position that’s strong, stable, and safe. Let’s dive into the mechanics that’ll take you from flailing to rock-solid.
Nailing the basics
First things first – shoulder depression. This is where your shoulders need to be anchored down, almost as if they’re glued in place, to support the massive load they’re holding. Your scapulae (the shoulder blades) should be retracted, meaning they’re pulled back and down to create a solid base. This positioning reduces strain on your joints and engages the right muscles, setting you up for a stable cross.
| Pro tip | Think about “packing” your shoulders down and back before you even lower into the position. This simple cue is your ticket to maintaining control.
Elbow lock
One of the biggest mistakes in iron cross form is bending at the elbows. A true cross has your arms locked out completely, which requires more than just bicep and tricep strength – it’s all about tendon resilience. Fully extended elbows place the load across the entire arm, reducing pressure on individual joints. Aim for a “no give” stance in your arms, where the elbows stay straight and engaged from start to finish.
| Quick check | If your elbows start to bend, you’re compensating. Pull back, re-focus on shoulder and core stability, and try again.
Wrist alignment
Wrist alignment is another big player in achieving a stable iron cross. Keep your wrists neutral – avoid flexing or letting them twist outward. This will distribute the weight evenly and allow you to grip the rings with a balanced hold. As you grip, remember that the iron cross isn’t about a “death grip.” Your hold should be firm, but overly tight wrists can lead to tension that drains energy.
| Grip tip | Experiment with a false grip for more wrist stability, especially if you’re new to ring work. This will give you a bit more control over the rings without taxing your wrists too much.
Muscles that do the heavy lifting
The iron cross demands a whole lot from specific muscle groups. Here’s how each one steps up to the challenge:
- Pectorals – Your chest muscles work overtime to hold your arms out wide, providing the initial “push” that keeps your torso stable.
- Deltoids – The deltoids (shoulder muscles) are the unsung heroes here, keeping your shoulders locked in place while absorbing the load.
- Biceps – The biceps help stabilize the arms, holding tension to keep the elbows straight and support the shoulder joints.
- Latissimus dorsi & forearms – These stabilizers engage to keep you balanced, helping you avoid unwanted twists or drops.
4 Common mistakes & quick fixes
Messing up the iron cross is part of the process – here’s how to spot the mistakes and self-correct.
1️⃣ Shrugged shoulders
If your shoulders are drifting up towards your ears, you’re compromising stability. Focus on “packing” your shoulders down as a first move.
2️⃣ Bent elbows
Any hint of a bend means you’re not fully locked out. Concentrate on extending fully, and use visual cues like mirrors or recording yourself to catch this.
3️⃣ Wrist flexion or twisting
If you find your wrists twisting, re-align your grip and keep it neutral. Check that your palms are flat against the rings to avoid strain.
4️⃣ Arching or sagging
Your core should stay tight, without your back arching or hips dropping. Engage your abs and glutes, locking your body into a straight line.
Injury prevention
When you’re aiming for the iron cross, it’s not just about brute strength. If your tendons and joints aren’t as tough as nails, you’re asking for a world of hurt. So, here’s where we dig into how to bulletproof your shoulders, elbows, and wrists before you even think of holding that iron cross. Think of this as the armor you’ll need to withstand the strain, grit, and commitment this journey demands.
Why tendon resilience is the real deal
Here’s the thing – tendons and ligaments aren’t like muscle. They don’t bulk up in a few weeks; they need time, repetition, and focused work to get as tough as you’ll need.
For the iron cross, they’ll carry the weight of every move, so skip tendon prep, and you’re setting yourself up for a crash landing. This training isn’t about brute force; it’s about training connective tissue to match the resilience of steel.
Prehab drills to make you unbreakable
Prehab is your insurance policy. These exercises hit the weak points – those joints and tendons that’ll keep you in the game long-term.
- Ring flies – Tackles your shoulder stability and makes your support tendons feel as solid as a tank. Keep those arms straight, and control the movement to lock in stability.
- Straight-arm drills – Think straight-arm pulldowns and holds. These toughen your shoulders and elbows, getting them ready to withstand massive strain.
- Scapula push-ups – These do wonders for shoulder resilience, making sure the muscles around your shoulder blades stay strong and responsive.
Warm-up & mobility
A good warm-up doesn’t just keep you loose; it gets those tendons ready to work. Add these mobility drills to keep your joints primed and durable:
- Resistance band rotations – A must for shoulder mobility. These warm up your rotator cuffs, critical for the iron cross.
- Dynamic forearm stretches – Don’t skip these; your wrists need a solid warm-up too. These stretches activate forearm muscles and tendons, reducing strain.
- Shoulder dislocates with bands – Enhances shoulder mobility, letting you reach full range safely.
Recovery
Injury prevention isn’t just about what you do during training; it’s also about what you do after. Tendons need serious TLC to adapt and stay strong.
- Spacing sessions – Tendons recover slower than muscles, so space out your iron cross sessions to let them rebuild.
- Foam rolling & soft tissue work – Keeps you loose, minimizes soreness, and preps your tendons for your next big session.
- Nutrition for tendon health – Think collagen-rich foods and anti-inflammatories like berries and nuts to speed up repair.
Injury prevention is part of the grind
Building joint resilience isn’t just a step in your training – it’s your foundation. Strengthen your tendons, and you’ll go farther, train harder, and keep seeing gains. With these habits locked in, you’re not just training for the iron cross; you’re building bombproof strength that’ll carry you through whatever’s next.
Step-by-step training progression & 4 Phases of goals
Mastering the iron cross is a journey that requires consistency, strength, and commitment. We’ve broken it down into four phases to build you up from foundational strength exercises to the final unassisted iron cross. Each phase has a specific focus, structured workout, and clear milestones. Let’s dive into each stage.
Phase 1 – Foundation-building exercises
To kick off, phase one focuses on building fundamental strength and stability across key muscle groups and joints. These exercises work your upper body, core, and connective tissues, preparing you for the intensity of iron cross training.
| Exercise | Reps | Sets | Tempo | Hold time (isometric) | Rest between sets |
| Ring dips | 8-12 | 3 (beginner), 4 (intermediate), 5 (advanced) | 4-1-2-0 | - | 60s (beginner), 50s (intermediate), 40s (advanced) |
| Static hangs | - | 3 | - | 40-60s (beginner), 50-70s (intermediate), 60-80s (advanced) | As above |
| Planches | 8-12 | 3/4/5 | 4-1-2-0 | - | As above |
| Hollow body holds | - | 3 | - | 40-60s (beginner), 50-70s (intermediate), 60-80s (advanced) | As above |
Weekly split: “Push, pull, legs” with ab exercises every other day. For example, train abs on Sunday, Tuesday, and Thursday, with two ab exercises following your main workout, and dedicate Sunday to three ab exercises alone.
Phase 2 – Assisted holds with resistance bands
In phase two, you’ll start mimicking the iron cross position with resistance bands to reduce load. This stage helps you get familiar with the movement and build endurance while gradually decreasing assistance as you progress.
| Exercise | Reps | Sets | Tempo | Hold time (isometric) | Rest between sets |
| Assisted iron cross holds | - | 3/4/5 | - | 40-60s (beginner), 50-70s (intermediate), 60-80s (advanced) | 60s (beginner), 50s (intermediate), 40s (advanced) |
| Scapula pull-ups | 8-12 | 3/4/5 | 4-1-2-0 | - | As above |
| Band-resisted push-ups | 8-12 | 3/4/5 | 4-1-2-0 | - | As above |
Weekly split: Follow the same “push, pull, legs” split as in phase one, focusing on decreasing the resistance on assisted holds over 4-6 weeks.
Phase 3 – Intermediate holds & time-under-tension sets
In phase three, start reducing or eliminating band assistance and focus on holding partial iron cross positions with controlled form. Time-under-tension sets build strength endurance to stabilize the movement, with a focus on achieving a 45-degree hold.
| Exercise | Reps | Sets | Tempo | Hold time (isometric) | Rest between sets |
| Partial iron cross holds | - | 3/4/5 | - | 40-60s (beginner), 50-70s (intermediate), 60-80s (advanced) | 60s (beginner), 50s (intermediate), 40s (advanced) |
| Time-under-tension sets | 8-12 | 3/4/5 | 4-1-2-0 | - | As above |
| Straight-arm pulldowns | 8-12 | 3/4/5 | 4-1-2-0 | - | As above |
Weekly split: Maintain 2-3 sessions per week to allow muscle recovery. Keep the “push, pull, legs” structure, adding ab exercises as you did in previous phases.
Phase 4 – Full unassisted iron cross
In the final phase, it’s time to attempt the full iron cross without assistance. Aim for shorter hold times initially, with the goal of progressively extending them.
| Exercise | Reps | Sets | Tempo | Hold time (isometric) | Rest between sets |
| Unassisted iron cross | - | 3/4/5 | - | 10-30s to start, build gradually | 60s (beginner), 50s (intermediate), 40s (advanced) |
| Advanced variations | - | 3 | - | 10-30s for moves like the maltese hold | As above |
Weekly split: Keep sessions 2-3 times weekly, allowing for full recovery in between. Track your progress and celebrate each hold increase and strength milestone.
Perfecting form & technique
So, you’re tackling the iron cross. This move demands precision at every angle. Forget about muscling through it—without sharp technique, you’ll hit a wall, and your joints will pay the price. Here’s how to master the details and lock in your form to nail the iron cross safely and effectively.
The essentials of iron cross form
The iron cross isn’t just about strength; it’s a symphony of muscle coordination and stability. Let’s break down the key components:
- Shoulder positioning – Shoulders should be “locked-in” and slightly depressed, not shrugged up. This positioning engages stabilizers and protects the shoulder joint.
- Elbow lock – Keep arms fully extended, without a bend. Elbows must be locked to avoid unwanted strain and ensure stability.
- Grip alignment – Use a neutral or false grip, depending on preference. Grip strength is vital for control, so ensure your grip is solid and supportive.
💪 Muscles in focus – pectorals, deltoids, biceps, and more
Each muscle plays a specific role in holding the iron cross. Here’s how:
- Pectorals – Provide the base power for keeping arms wide.
- Deltoids and biceps – Act as primary stabilizers.
- Lats and forearms – Support by adding control and counteracting force.
Together, these muscles form the framework for a rock-solid iron cross.
🚫 Troubleshooting common form errors
Most people struggle with a few key points when starting out. Here’s what to watch for and correct:
- Bent elbows – If you notice any bend, focus on arm straightening drills. A slight bend can lead to injury.
- Shrugged shoulders – Keep shoulders “down and back.” Practice scapular depressions to reinforce this positioning.
- Weak grip – If grip is slipping, consider grip strengtheners or support holds to build a rock-solid grip.
Practice makes perfect
Perfecting the iron cross takes time and repetition. Even if you’re not quite ready to hold the full position, you can work on technique with non-weight-bearing moves:
Wall-assisted holds – Use a wall to support your weight while practicing shoulder and arm positioning.
Isometric holds – Build endurance with holds at lower intensity levels, then progress. Aim for 40–60 seconds as a beginner, gradually increasing as you advance.
| Practice drill | Reps/sets | Hold duration | Tempo |
| Wall-assisted holds | 3 sets of 8–12 reps | 40–60 seconds | 4–1–2–0 |
| Isometric holds | 3 sets of 8–12 reps | 40–60 seconds | 4–1–2–0 |
🔁 “Quick reminders” for safe progress
- Reinforce shoulder stability – Practice holds daily, even in non-weight-bearing forms, to get used to shoulder alignment.
- Focus on endurance – Gradual increases in hold time make a massive difference.
- Avoid over-gripping – If you’re tensing too much, it may signal weakness in supporting muscles. Go slow to prevent strain.
Tools & gear for iron cross training
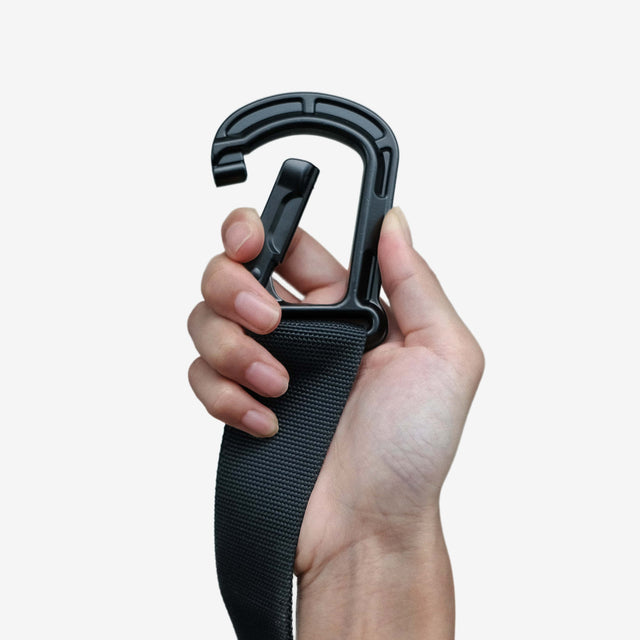
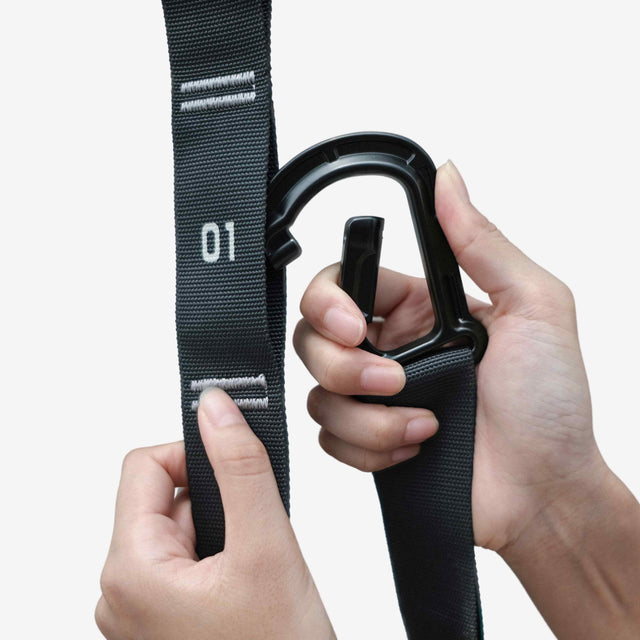
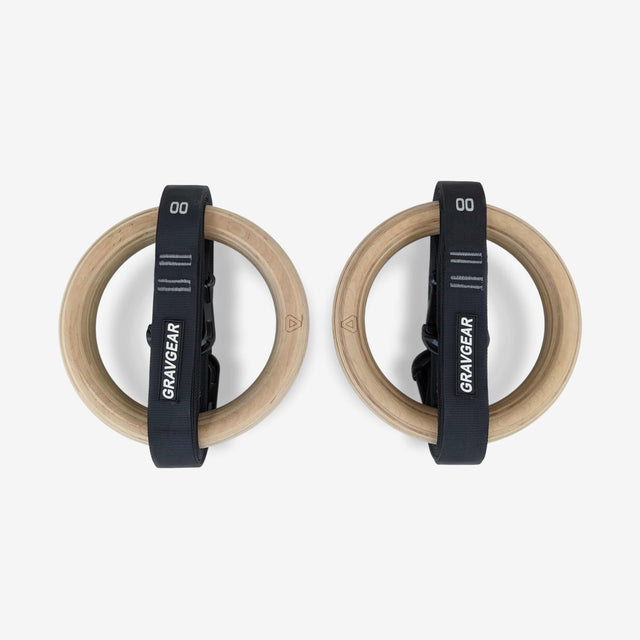
When you’re tackling the iron cross, having gear that’s tough enough to keep up is key. This isn’t about flashy equipment—it’s about solid, reliable tools built to handle your hardest sessions, whether you’re training in the backyard or hitting the gym. Here’s the rundown on what’ll give you that bombproof support Gravgear’s known for.
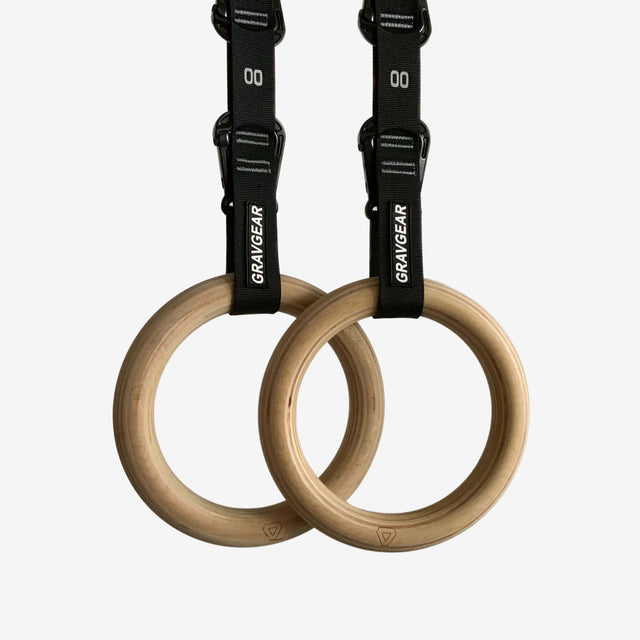
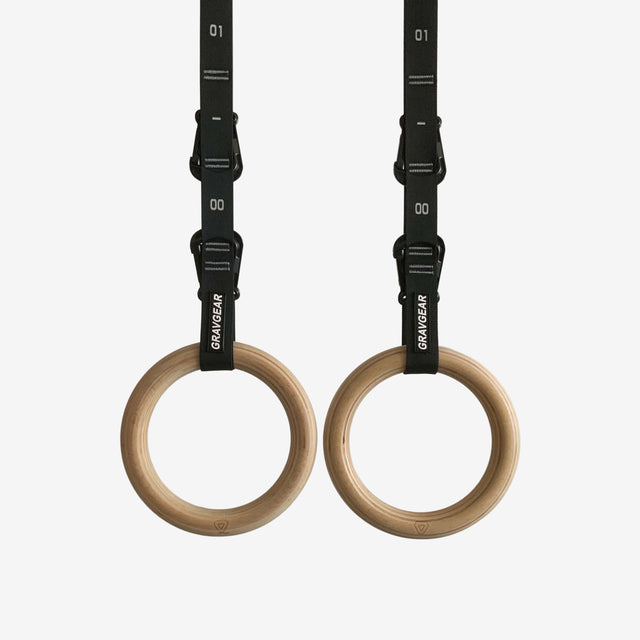
High-quality rings
Wooden rings are the top pick for iron cross training. Unlike slippery plastic, wood’s natural feel gives your hands better grip, especially when the sweat’s pouring. They’re built to last, giving you confidence with every hold.
| Tool | Benefits |
| Wooden rings | No-slip grip, comfy in your hands. |
| Plastic rings | Budget-friendly but less grippy. |
Supportive accessories
The right accessories go a long way in keeping you safe and ready for action:
Wrist wraps – These give you stability without limiting movement. Ideal for long sessions where wrist strain might creep in.
Resistance bands – For anyone progressing toward unassisted holds, bands give just the right support while you build up. Start with thicker bands and scale down as you get stronger.
| Accessory | Purpose |
| Wrist wraps | Supports wrists, prevents strain. |
| Resistance bands | Assists hold, builds strength gradually. |
Progressive load gear
Sometimes, you need to inch up in strength, not leap. Fractional weights and cross trainers help you do just that by giving you control over how much resistance you add.
| Tool | Purpose |
| Fractional weights | Adds weight slowly, avoids overload. |
| Cross trainers | Adjustable for progressive load control. |
💡 DIY options for the budget-minded
Not keen on breaking the bank? Try these alternatives:
- DIY resistance bands – A sturdy, stretchy fabric can act as a band in a pinch.
- Homemade cross trainers – Use PVC pipes or broomsticks for assisted holds or support exercises.
Usage guide
- Resistance bands – Start with thicker bands and work down as you progress. These are gold for building strength without straining your muscles too early.
- Wrist wraps – needed for long holds, these keep you steady and protect your wrists.
- Cross trainers – Perfect for maintaining stability as you progress through each training phase. Adjust resistance to challenge yourself without compromising form.
Psychological & motivational strategies for long-term training goals
When it comes to mastering the iron cross, mental resilience can be as crucial as physical strength. This isn’t just any goal—it’s a test of endurance that spans months or even years.
🔥 Here’s how to stay focused, motivated, and determined on your journey 🫵
Focus on the process, not just the goal
The iron cross is a grind that requires both grit and a good dose of patience. Progress isn’t linear, and it’s common to face setbacks or weeks where it feels like nothing’s happening. To keep pushing forward, focus on each small win as it comes rather than fixating on the end goal. Each workout, each small improvement, is a vital step toward achieving the full hold.
Mindset shift: Think of your journey as a mountain climb—each new milestone gives you a view of how far you’ve come, not just how far you have left.
Set achievable mini-goals
Breaking the iron cross down into bite-sized milestones can make the big goal feel a whole lot more manageable. Small wins build momentum, keeping you energized. Start by aiming for specific, tangible outcomes: a longer static hold, improved shoulder stability, or holding a partial cross.
Mini-goals worth celebrating:
- First 10-second static hold – Shows you’ve nailed basic shoulder stability.
- Clean, locked-out hold with no arm bend – Major progress in tendon strength and alignment.
- First unassisted partial cross – Proof that all your hard work is paying off.
Log every small victory
Tracking your progress is needed, especially when progress seems slow. Set up a training log where you can record each milestone—no matter how small. Watching your improvements stack up over time can be incredibly motivating, especially on days when motivation feels low.
| Progress Tracker | Weekly milestones |
| Static hold improvement | Record how long you can hold each week. |
| Shoulder stability in each position | Check for even weight distribution. |
| Locked elbow strength | Note any wobble or fatigue points. |
Reminders to fuel your progress
- “It’s not about perfection; it’s about progress.”
- “The iron cross will humble you—but that’s part of the fun.”
- “If it’s not challenging you, it’s not changing you.”
Practical motivation hacks
Here are a few tactics to help stay in the game mentally, especially during slow phases or after a tough training session:
- Visualize the outcome: Imagine what achieving the iron cross will feel like and how far you’ve already come.
- Reward milestones: Each new mini-goal met? Treat yourself to something—whether it’s a new band, your favorite snack, or a break day. (this is underrated if you’ve disciplined yourself hard during your own come-up story)
- Find a support system: Training can feel lonely, so don’t hesitate to team up with a friend or join an online group for accountability. (like our 3k+ member telegram group for calisthenics beginners to pros!)
Even if you think all this motivational advice is BS, sitting down and actually seeing ways you can start trying them out can be helpful and in and of itself.
Functional vs. aesthetic training
When it comes to gymnastics, function is king. If you’ve noticed gymnasts have powerful upper bodies and leaner legs, it’s all about keeping things light for a powerful performance. The iron cross, and every other big move on the rings, demands a finely tuned strength-to-weight ratio, where extra leg weight can throw things off. Here’s why gymnasts go all in on upper body power, and how you can train with a functional approach while keeping a balanced build.
Why upper body strength takes the spotlight 💪
The iron cross isn’t just about raw strength—it’s about serious control. Holding your body in high-tension, static positions like the iron cross takes immense upper body strength. Heavier legs? They’d make things a whole lot tougher to control. Gymnasts focus on building strength where it counts—upper body—while keeping their lower body lean to help with stability, agility, and control.
✨ Quick insight – Strong upper bodies and lean legs aren’t just a style. For gymnasts, they’re needed for peak performance.
Gymnastics is all about function 🧗
Gymnasts focus on what works. The iron cross, along with other advanced skills, needs every muscle in your body working in perfect sync. Rather than building size for aesthetics, gymnasts target core, shoulder, and upper arm strength to create balanced, powerful movements that keep them nimble.
🔹 Gymnastics approach – Gymnasts keep things lean, building strength that’s functional and won’t weigh them down, while still being powerful and balanced.
Balanced training ideas ⚖️
Looking for balance without compromising performance? Here’s a shortlist of functional exercises to build strength in your legs and core, so you can train hard while staying light on your feet:
| Exercise | Purpose | Sets & reps |
| Pistol squats | Single-leg strength, stability | 3 sets of 8-12 reps |
| Core compression drills | Core strength, mobility | 3 sets of 10-15 reps |
| Bulgarian split squats | Functional leg strength | 3 sets of 8-12 reps |
| Hanging leg raises | Core & hip strength | 3 sets of 10-15 reps |
Training for leanness & power 🔥
Gymnastics training zeroes in on quality over bulk, choosing exercises that create controlled, powerful movements without the extra weight. This is the key difference in building strength for gymnastic moves like the iron cross. It’s all about honing a physique that’s primed to tackle the rings with unmatched control and power.
Mindset – Strength and precision are everything. Build a powerful yet balanced body, and you’ll hit the rings with confidence, stability, and agility.
Special considerations for older athletes
Alright, so you’re hitting the iron cross training a bit later in the game. Maybe your 30s, maybe beyond. Here’s the good news—it’s absolutely doable. Age doesn’t have to be a barrier; it just means you’ve got to approach things a little differently. This section’s all about smart training, keeping your joints bulletproof, and pacing yourself so you’re not burning out before you even begin.
Flexibility & joint health – Build the foundation 🏗️
With age, flexibility and joint care are a bit like that bombproof foundation under a house—essential, especially for moves as intense as the iron cross. Start with plenty of time spent on mobility drills and joint prehab, focusing on your shoulders, elbows, and wrists. Every inch of flexibility counts when you’re working on a move that demands full control.
- Warming up – Light resistance band work, scapula push-ups, and shoulder rotations are golden for pre-workout joint health.
- Dynamic warm-ups – Keep your stretches active before hitting the rings. Think: shoulder circles, wrist circles, and gentle resistance band rows.
✨ Tip – Add 5-10 minutes of joint-focused warm-ups to every session. This extra prep time pays dividends when it comes to preventing those pesky tendon injuries.
Slower progression & smarter training gains 🐢
Going all-in on max holds or high reps isn’t the goal here. A steady, paced progression will build your strength and resilience safely. For older athletes, it’s about being consistent rather than crushing max reps or pushing to failure.
| Exercise | Reps | Sets | Rest |
| Ring flies | 8-12 | 3-5 | 50-60 seconds |
| Scapula push-ups | 10-15 | 3-5 | 50-60 seconds |
| Supported iron cross holds | 40-60 seconds | 3 | 60 seconds |
⏲️ Time under tension – Keep the tempo controlled with a 4-1-2-0 cadence for each rep. Building tendon strength is the priority, not racing through the movements.
Keep your tendons tough & joints steady 🤲
For those of us who’ve clocked a few years, tendon and ligament resilience matters more than ever. Regular “prehab” exercises—those tendon-targeted moves like scapula push-ups and isometric holds—should be in every week’s lineup. They’ll give your joints the support they need for demanding holds while keeping that iron cross progression pain-free.
- Equipment essentials – Resistance bands for assisted holds and fractional weights for progressive load help you train safely without hammering your joints.
- Split your week – Try a “push, pull, legs” split to let each muscle group recover, while still giving you the habit of showing up each day.
Mindset – The journey is the win 🔥
No need to compare your progress with anyone else’s. Think of each week as a win and each gain as a step forward. Training for the iron cross as an older athlete is about the long haul, so focus on incremental goals, like increasing your hold times by just a few seconds each week.
Your iron cross come-up story starts TODAY 💨🏃♂️➡️
So here’s the wrap-up, mate: mastering the iron cross isn’t a quick win; it’s a true test of grit, patience, and dedication.
This move demands more than just raw strength—it needs finesse, joint resilience, and the commitment to put in the time.
Every milestone, from your first clean hold to locking out a partial iron cross, is something to be bloody proud of.
This journey is yours to own, and every step forward, no matter how small, is solid progress.
Some days will be tough; you’ll hit walls, and setbacks might feel like they’re part of the package.
But here’s the thing—those setbacks?
They’re just more of the journey, helping you build the grit you need to hold the cross steady.
What’s next?
- Drop a comment below giving any feedback on this blog, sharing ideas, or showing others what’s possible
- Join our Gravgear telegram channel with over 3k+ members so you can share your progress
- And link this blog to your calisthenics comrades so they get on this challenge too!
This guide? It’s just the start. Keep showing up, train smart, and, most importantly, enjoy every second of your journey toward the iron cross.
Whether you’re training in the outback or your backyard, remember: you’re part of a community of legends who know what it takes to stick it out.
So get after it, mate—this is where your iron cross journey begins…



1 Comment
Thanks for the ai slop, I’ll make sure to avoid this brand from now on 😃