Exactly How To Hang Gymnastic Rings Absolutely Anywhere
Learn how to install gymnastic rings at home or outdoors using ceiling joists, pull-up bars, I-beams, or trees. Ensure safety with proper tools, double loops, and 50 cm spacing. Adjust height for dips, pull-ups, rows. Secure straps, prevent wear with padding & explore cost-effective DIY options.
What set up are you looking for specifically? Jump to 👇
- 4 Gymnastic rings setup types
- How to install gymnastic rings on a pull-up bar
- How to install gymnastic rings from a ceiling joist
- How to mount gymnastic rings to I-beams
- Hanging gymnastic rings outdoors
- How to set up gymnastic ring straps
- How to adjust gymnastic rings
- Gymnastic ring spacing
- Gymnastic rings height
- How to secure gymnastic rings
- Uneven gymnastic rings (Common issue #1)
- Preventing slippage (Common issue #2)
- Dealing with limited space (Common issue #3)
- Weatherproofing outdoor rings (Common issue #4)
- 3 Cost-effective gymnastic rings setup solutions
4 Gymnastic rings setup types
Choosing the right gymnastic rings setup can make or break your workouts.
Whether you're in an apartment, garage, out in the bush, or on the go, a proper setup ensures safety and performance for setting up your gymnastic rings down under.
Gymnastic rings at home 🏠
Living in a compact space doesn't mean you have to compromise on your fitness goals.
With a bit of creativity and the right gear, you can hang gymnastic rings at home and start training like a pro.
Doorframe pull-up bars
- Sturdy and adjustable
- Fit the bill perfectly
- A breeze to install
Doorframe pull-up bars are solidly built and perfect for hanging gymnastic rings in an apartment. They're ideal for exercises like ring rows and incline push-ups.
You'll be stoked at how easy it is to set up and start your ring workout without breaking your bank.
If you can access ceiling joists, you can mount gymnastic rings securely to them too. They feel extremely safe when using them, and you can train with confidence knowing your setup is kid-proof.
Hanging gymnastic rings in garages 🛠️
Garages are top-notch for gymnastic rings setups. They have solid anchors like ceiling joists, exposed beams, or I-beams.
Ceiling joists
- Drill into beams
- Install lag bolts
- Around 50 cm spacing
Drill directly into wooden beams with lag bolts to mount your rings. Proper spacing provides stability.
It's a whole new challenge that will humble you but also make you stronger.
I-beams
- Use beam clamps
- Climbing-rated carabiners
- Preserves beam integrity
Use beam clamps or climbing-rated carabiners (22 kN+) to hang gymnastic rings from an I-beam. This method is adjustable, safe, and preserves the beam's integrity. The strapping feels like it could lift several wooly mammoths, so you can use it with confidence.
If you don't want to drill into your garage ceiling, portable rigs are a solid alternative. They're ideal for muscle-ups, front levers, and dips.
Chuck them in the back of your car and set them up wherever you like. They make workouts feel a bit more playful, and damn do they challenge your body.
Installing gymnastic rings outdoors 🌳
Take your workouts to the bush or your local park for a breath of fresh air. Training outdoors is a new fun and outdoor way to move.
Trees
- Use sturdy branches
- At least forearm-thick
- Wrap straps for protection
Gum trees are sturdy and perfect for hanging gymnastic rings. Use branches at least as thick as your forearm.
Wrap old towels or neoprene sleeves around branches to protect your straps and increase their lifespan.
You'll be out in the outback, feeling like you're flying through your workouts.
Playgrounds
- Monkey bars
- Swing frames
- Inspect for safety
Monkey bars or swing frames in playgrounds make excellent anchor points. Just inspect for rust and stability before use.
You'll probably want to work out super early so you won't get seen by the public in the park where you're likely to train.
Set up gymnastic rings portable rigs 🧳
For on-the-go training, portable rigs are unbeatable. They're ideal for backyards, parks, or the outback.
Portable rigs are perfect if you're always on the move. They're lightweight yet sturdy, so you can train on the go without compromising safety.
Adjusting is a breeze, allowing you to switch between exercises with ease.
DIY alternative
- Steel pipes
- Wooden beams
- Ensure strength
Build your own rig with steel pipes or wooden beams. Just make sure it's strong enough for dynamic movements like dips or kipping pull-ups.
You'll feel extremely safe using them, and it's a cost-effective solution if you're not keen on spending big bucks.
How to install gymnastic rings on a pull-up bar
Installing gymnastic rings on a pull-up bar is a straightforward process that lets you dive into ring exercises without needing a full gym setup.
Here’s how to hang gymnastic rings on a pull-up bar safely and securely…
How to attach gymnastic rings to a pull-up bar using the double-loop technique 🪢
To ensure your gymnastic rings stay put during intense exercises, the double-loop technique is your best mate.
By looping each strap over the bar twice, you create extra friction that prevents slipping—even when you're smashing out ring pull-ups or dips.
Loop the strap over the bar
Toss the strap over your pull-up bar, letting it hang evenly on both sides.
Loop it back over again
Bring the strap over the bar a second time, making sure it lies flat and untwisted.
Thread through the buckle
Feed the loose end through the buckle, pulling it tight to secure the rings.
This method stabilizes the straps and keeps your gymnastic rings firmly attached to the pull-up bar.
It's a simple way to set up gymnastic rings at home without any fancy equipment.
How to adjust gymnastic rings for safety 🔧
Once you've installed the rings, it's crucial to adjust them properly and test the setup.
Knowing how to adjust gymnastic rings ensures you can train hard without worrying about slips or mishaps.
1️⃣ Set the ring height
Adjust the straps to position the rings at your desired height—low for ring rows or high for pull-ups. This flexibility makes your gymnastic rings home setup versatile.
2️⃣ Ensure even length
Make sure both rings hang at the same height to keep your workouts balanced.
3️⃣ Test the setup
Stand beneath the rings, grab them, and apply gradual downward force. Start with a light pull to confirm the straps hold steady.
4️⃣ Hang with full bodyweight
Once confident, hang with your full bodyweight to ensure everything stays put.
If you notice any slippage, reloop the straps or add grip tape to the pull-up bar for extra traction.
This simple fix can make your gymnastic rings installation bombproof.
How to install gymnastic rings from a ceiling joist
Setting up gymnastic rings at home by mounting them to your ceiling joists is a solid way to create a secure setup. Here's how to hang gymnastic rings from the ceiling safely and securely…
How to locate ceiling joists for hanging gymnastic rings 🔎
First things first, you need to find strong, weight-bearing joists in your ceiling.
Use a stud finder or magnet
Use a stud finder or a strong magnet to locate the wooden beams hidden beneath the drywall.
Hold the stud finder flat against the ceiling and move it slowly until it detects a joist.
Once you've found a joist, mark its center with a pencil.
Mark the gymnastic ring spacing
Mark two points about 50 cm apart, aligning with the Olympic standard for gymnastic rings distance apart.
Knowing how far apart to hang gymnastic rings ensures stability during dynamic exercises and prevents awkward alignment.
How to drill pilot holes in the joists 🛠️
Drilling into a joist requires precision because you don't want to split the wood or end up with uneven rings.
Choose the right drill bit
Use a drill bit slightly smaller in diameter than your hook bolts to create pilot holes.
This ensures the bolts fit snugly without damaging the joist.
Drill the holes carefully
Hold the drill at a 90-degree angle to the ceiling for straight, even holes. Drill at least 5 cm deep or follow your hardware’s specifications.
Align the holes properly
Confirm both holes are aligned to avoid uneven strap spacing. Uneven rings can humble you real quick during your workout.
How to mount gymnastic rings to the ceiling joist 🔩
Now it's time to install gymnastic rings by inserting the hook bolts or ceiling hangers.
Select heavy-duty hardware
Choose heavy-duty hook bolts or ceiling hangers rated for at least double your bodyweight—typically 150-200 kg.
After all, you need to literally put your life in the hands of the kit, and you don't want it to let you down!
Insert the hook bolts securely
Thread the bolts into the pilot holes by hand, ensuring they catch securely.
Tighten fully with a wrench, but stop once the bolts sit flush with the beam to avoid overstraining the wood or hardware.
How to attach gymnastic ring straps & secure them 🎗️
With the hardware in place, it's time to attach the straps and secure your gymnastic rings.
Attach the straps properly
Thread the straps through the hook bolts or hangers, ensuring there are no twists in the material. Knowing how to tie gymnastic rings properly keeps your setup solidly built.
Adjust the gymnastic rings height
Adjust the straps to position the rings at your desired height—low for ring rows, higher for pull-ups.
Adjusting is a breeze if you've got marked straps, making your gymnastic rings home setup versatile.
Test the setup thoroughly
Stand beneath the rings, grab them, and apply gradual downward force.
Start with a light pull to confirm the straps hold steady.
Hang with your full bodyweight
Once confident, perform a controlled hang using your full bodyweight. Look for any instability or movement in the bolts or straps.
If you notice any wear on the straps near the bolts, protect them with a small piece of fabric, rubber, or foam padding.
This prolongs the life of your straps and keeps adjustments smooth.
How to mount gymnastic rings to I-beams
Mounting gymnastic rings to an I-beam is a solid way to set up gymnastic rings at home or in your garage.
I-beams are as sturdy as they come, so you can trust them to handle the strain of your ring workouts—even those hard-as-nails muscle-ups.
How to choose the right hardware for hanging gymnastic rings from an I-beam 🔧
Before you start, you need to pick the right gear because the wrong hardware can lead to slippage or instability, and you don't want that when you're hanging upside down.
🗜️ Beam clamps
Adjustable clamps that grip the flange of the beam.
Look for ones rated for at least twice your bodyweight (aim for 300-400 kg)
Beam clamps with integrated eyelets prevent the straps from shifting during use, which is crucial for dynamic exercises.
🧗♂️ Carabiners
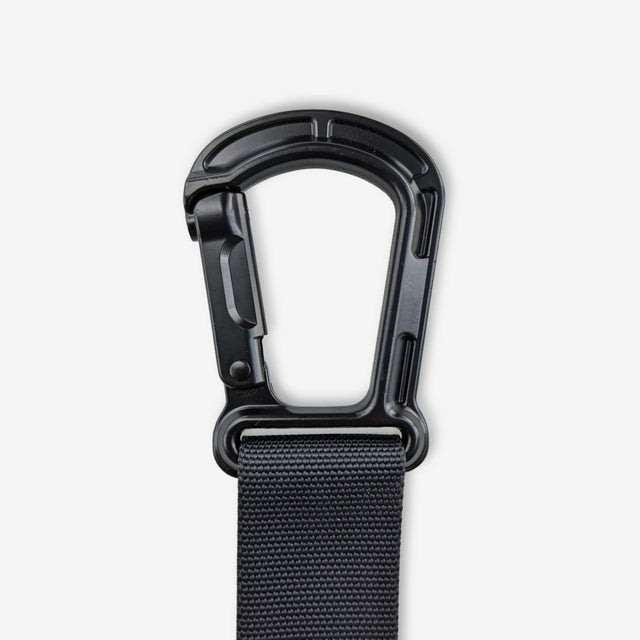
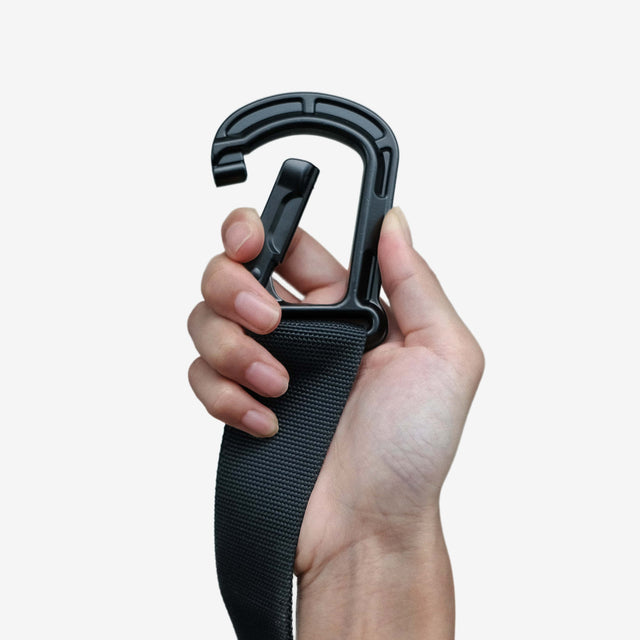
Search for heavy-duty climbing carabiners rated for at least 22 kN (about 5,000 lbs). These are lightweight yet robust—ideal for your gymnastic rings setup.
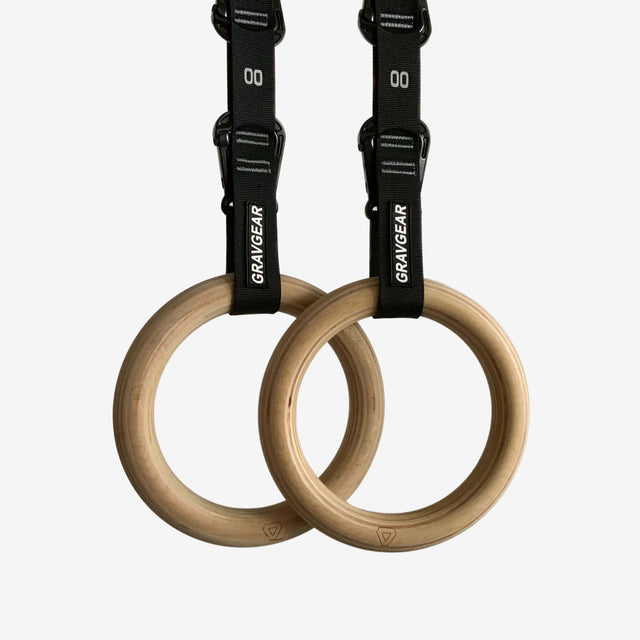
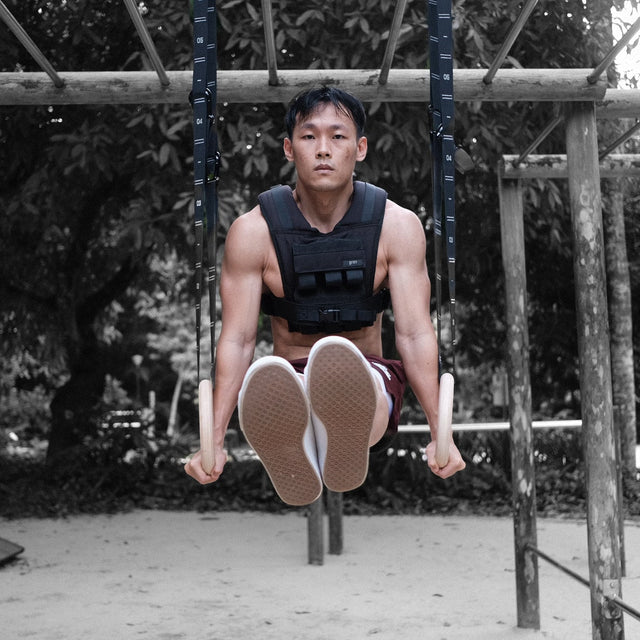
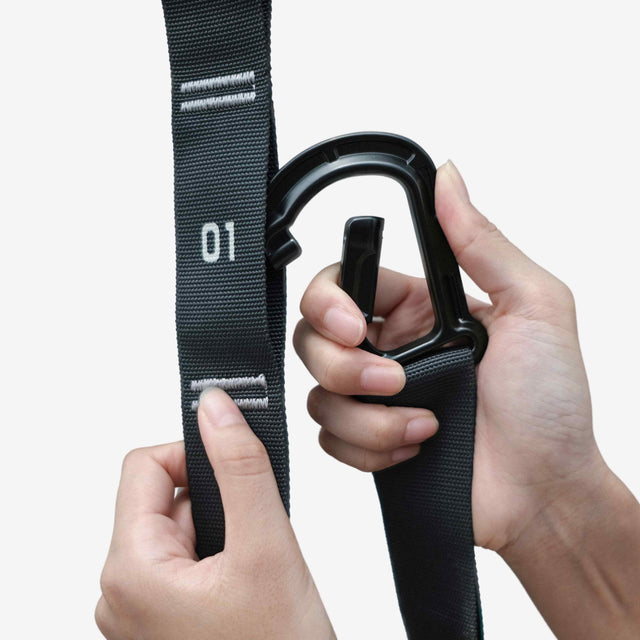
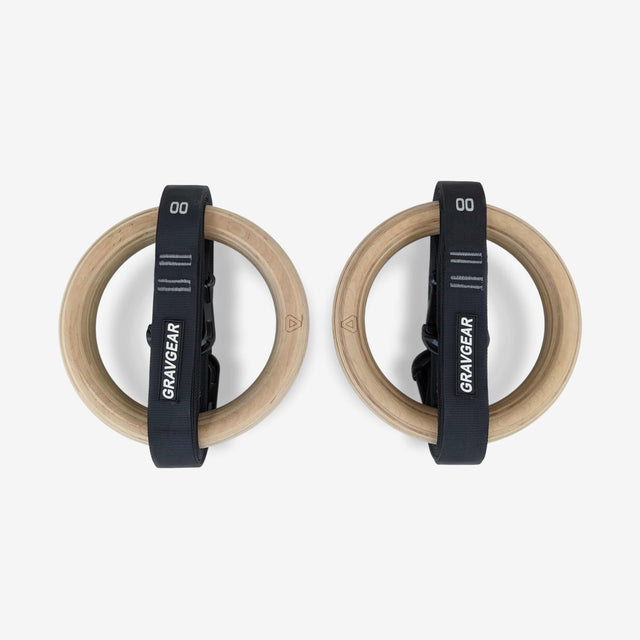
We actually do carabiner gymnastic rings right here at Gravgear. You can check 'em out here if you like.
How to prepare the I-beam for your gymnastic rings installation 📏
Proper preparation is key to a spartan-proof setup.
1️⃣ Measure the flange width
Use a tape measure to check the width of the I-beam's flange (usually between 5-15 cm). This ensures your clamps or carabiners will fit securely.
2️⃣ Clean the surface
Wipe down the flange to remove any grease or dirt. A clean surface improves grip and reduces slippage.
3️⃣ Inspect the beam
Look for rust, cracks, or any damage. Only use beams in good nick to avoid any nasty surprises mid-workout.
How to attach gymnastic ring straps to the I-beam 🛠️
Now, let's get those gymnastic rings attached.
For beam clamps 🗜️
Slide the clamps onto the flange and tighten them evenly with a wrench. They should be rock-solid, not wobbling about.
For carabiners 🧗♂️
Loop them directly over the flange. If the flange is narrow, you can add a piece of padding—like a folded towel or foam—to prevent movement.
👍 Attach the straps securely
- Feed the straps through the buckles, make sure the straps lie flat with no twists. Twisted straps can compromise stability.
- Wrap the strap around the beam twice before securing it through the buckle. This reduces slippage and adds extra security.
Pro tip: Position the buckle outward for easy adjustments on the fly.
How to adjust and test your gymnastic rings setup 👷♂️
Before you go full throttle, you need to test your setup.
👀 Visual inspection
Check that everything looks solid—no twists, clamps are tight, straps are flat.
💪 Pull test
Grab the rings and give them a good yank to mimic bodyweight resistance.
✊ Full body hang
Gradually apply your full body weight. Listen for any creaks or movement.
If anything shifts or slips, readjust until everything feels solid as a rock.
Adjust the gymnastic rings height and spacing
- Set the ring height
Adjust the straps to your desired height—low for ring rows, higher for pull-ups. - Ensure even length
Make sure both rings hang at the same height to keep your workouts balanced. - Check the gymnastic ring spacing
The standard distance between gymnastic rings is 50 cm (about 20 inches) from center to center. Knowing how far apart to hang gymnastic rings ensures stability during exercises.
🛡️ Pro tip: Protect your straps for longevity
I-beams can have sharp edges that wear down your straps over time. Use a bit of old yoga mat, foam insulation tubing, or heavy-duty duct tape between the strap and the beam. This small step keeps your straps in top shape for years.
Hanging gymnastic rings outdoors
Setting up gymnastic rings outdoors opens up a world of creative workouts. But when you're hanging gymnastic rings from uneven or rough anchor points, you need to take extra precautions to keep things safe and solidly built.
Choose sturdy anchor points
Before you start, find reliable outdoor structures that can handle your weight because your safety depends on it.
Tree branches 🌲
- Select a branch at least 20 cm thick.
- Inspect for cracks, rot, or signs of instability.
- Give it a firm shake; if it holds steady, you're alright.
Hanging gymnastic rings from a sturdy tree branch is a classic way to bring your workouts into the bush. It's an outdoor exercise that feels and looks cool AF, letting you move in new, fun ways.
Playground equipment 🛝
- Metal monkey bars or swing set frames are ideal.
- Ensure the structure doesn't wobble when weight is applied.
You'll probably want to work out super early so you won't get seen by the public in the park where you're likely to train.
But using playground equipment is a brilliant way to set up gymnastic rings without breaking your bank.
Protect your straps 👌
Outdoor conditions and rough surfaces can wear down your straps over time. Protect them to prolong their life because you don't want your kit letting you down. Wrap a layer of fabric, like an old towel or neoprene sleeve, around the contact point between the strap and anchor.
This reduces friction and prolongs strap life.
The strapping feels like it could lift several wooly mammoths, but even the best gear needs a bit of care.
Adding padding helps keep your gymnastic rings attachment in top shape.
Inspect regularly 👀
After each session, check the straps for fraying and replace damaged straps immediately to avoid accidents.
Outdoor setups expose your gear to sun and rain, which can weaken materials. Regular inspections ensure you can use them with confidence every time you train.
How to set up gymnastic ring straps
Straps are the backbone of your gymnastic rings setup—the lifeline of your workouts. Proper alignment ensures stability, security, and comfort across all exercises.
Let's break it down step by step…
Start with untangled straps 🎗️
First things first, lay each strap flat on a clean surface like the floor or a table.
Run your hands along the length of the straps, feeling for any twists, frays, or weak spots.
Twists not only reduce stability but can make adjusting the gymnastic rings height awkward.
If you notice fraying or damage, replace the straps before proceeding because you don't want your kit letting you down.
💡 If the straps are heavily creased, gently pull them taut between your hands to smooth them out before threading. This makes adjusting a breeze later on.
Thread straps through cam buckles properly
Securing your straps using a cam buckle is the heart of your gymnastic rings setup. Here's how to attach gymnastic rings to the straps properly:
1️⃣ Feed the loose end
Take the free end of the strap and insert it through the bottom slot of the buckle, ensuring the smooth side of the strap faces outward.
2️⃣ Pull upward
Guide the strap through the top slot, keeping it flat and untwisted as you pull it through.
3️⃣ Tighten securely
Pull firmly on the loose end to cinch the buckle, ensuring the strap lies flat and snug. Adjust until the ring is at your desired height, checking that the buckle locks tightly without slipping.
💡 Position the buckle on the side of the strap facing away from your body during exercises. This prevents accidental loosening when gripping the rings and keeps your gymnastic rings home setup solidly built.
How to tie gymnastic rings for stability
Properly securing excess strap length keeps your setup tidy and prevents hazards during workouts.
Loose ends can dangle, distract, or even cause accidents. Manage them effectively:
Velcro ties 🪢
Coil the excess strap neatly and secure it with velcro ties designed for cables or gym equipment. These are easy to apply and adjust.
String or shoelaces 👟
For a quick fix, tie the strap into a compact bundle using string or laces. Ensure the knot is tight but easy to undo.
When threading or tying, avoid mistakes that could loosen the straps under pressure.
Pull firmly 🤜
After tying or threading, give the straps a strong tug to ensure they hold securely.
Lay flat 🫳
Arrange the straps so they lie flat against the anchor, avoiding overlaps or folds that could compromise stability.
Or...
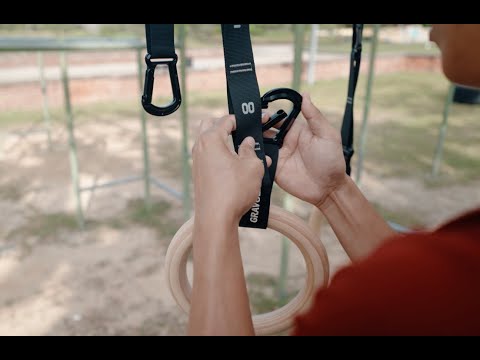
You could avoid all of that hassle with carabiner gymnastic rings. And set everything up in under 13 seconds.
Just saying 🤐
How to adjust gymnastic rings
Adjusting your gymnastic rings to the correct height and alignment is essential for safe and effective training because it ensures every exercise hits the mark. Let's make sure every move is dialed in perfectly.
Adjust the ring height ⚙️
Tailor the ring height based on your exercise and comfort level. Adjusting is a breeze once you know how.
Low height
- Ideal for: Push-ups, rows, and support holds.
- Setup: Set the rings so they hang just above the ground, allowing your body to fully extend without strain.
Mid-height
- Perfect for: Dips and core work like L-sits.
- Setup: Adjust the rings to roughly waist or chest height for optimal leverage.
High height
- Best for: Pull-ups, muscle-ups, and other hanging exercises.
- Setup: Position the rings slightly above head level, ensuring enough clearance for movements.
To adjust the height:
- Press the lever on the cam buckle to release the strap.
- Slide the strap to your desired length.
- Double-check that both rings hang evenly by measuring or visually aligning them.
💡 Mark common height settings with a piece of chalk, tape, or pen on the straps for quick adjustments during workouts. This way, you can adjust length on the fly and get straight into your ring workout without fuss.
Level your rings 🧭
Uneven rings can disrupt balance and compromise form. Use these methods to ensure perfect alignment because you don't want to be humbled by uneven rings.
Body alignment
- Stand beneath the rings and align them visually with your shoulders.
- Adjust until both rings hang at the same height.
Measuring tape
- Measure from the floor to the base of each ring to confirm they are equidistant.
Spirit level
- Rest a spirit level across the two rings.
- If the bubble is centered, your setup is balanced.
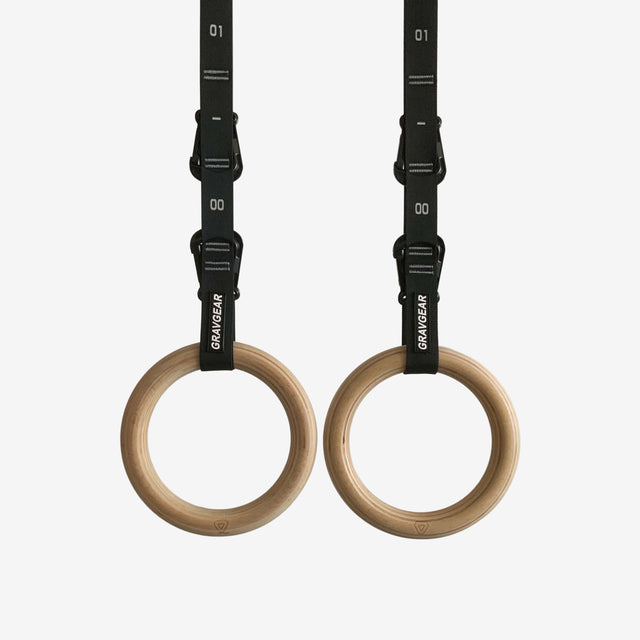
💡 For frequent height adjustments, consider straps with numbered markings for easier alignment. You'll be stoked at how much time this saves, keeping your focus on smashing out those exercises that challenge your body in ways you probably didn’t think of.
Gymnastic ring spacing
Proper gymnastic ring spacing ensures stability, comfort, and ideal mechanics for each movement.
Adjusting the distance between gymnastic rings to match your workout goals and equipment setup is key because it affects how you perform each exercise.
Olympic standard distance 🎖️
Set your rings 50 cm (about 20 inches) apart, measured from the center of one ring to the center of the other.
This is the standard used in competitions and supports most exercises, including dips, rows, and pull-ups.
When to use this spacing:
- For precision and competitive training
- General fitness routines that follow standard practices
Sticking to this benchmark ensures you're training like the pros and can help improve your form and technique.
Adjust for comfort
Not all body types or exercises fit perfectly within the Olympic standard.
You can adjust the gymnastic rings distance apart slightly wider or narrower based on personal preference and exercise goals.
Wider spacing
- Ideal for: Moves like ring flies or wide push-ups
- Benefits: Adds comfort and allows for a greater range of motion
Adjusting the rings wider can make certain exercises more challenging and help target specific muscle groups.
It's a new fun and outdoor way to move that challenges your body in ways you never imagined.
Narrow spacing
- Ideal for: Beginners performing dips or rows
- Benefits: Improves stability and makes it easier to control the rings
Keep the rings no closer than shoulder width to maintain balance because too narrow spacing can compromise form.
You'll feel extremely safe using them, allowing you to focus on smashing out those exercises.
Measuring tips
🚩 Mark anchor points
Use a measuring tape to mark 50 cm or your preferred spacing on your ceiling, bar, or beam.
This makes setting up gymnastic rings at home more precise.
🔭 Align straps precisely
Thread straps so their anchor points match the marks. Adjusting is a breeze when your gymnastic rings attachment points are clearly marked.
🤔 Recheck often
If you move your rings frequently, verify spacing during each setup to avoid misalignment. You'll be stoked at how much this attention to detail improves your workouts.
💡 For frequent adjustments, consider using straps with numbered markings. They make aligning the rings quick and simple, keeping your focus on obliterating bar dips and other challenging exercises.
Gymnastic rings height
Setting your gymnastic rings at the right height is crucial because it ensures proper mechanics and minimizes strain on your joints.
Knowing how to adjust gymnastic rings allows you to get the most out of your workouts at home.
Here's how to set up gymnastic rings for different movements, so you can smash out those exercises effectively 👇👇
Dips ⚖️
When hanging gymnastic rings for dips, position them at chest height, allowing enough clearance to lower your body fully without touching the ground.
For beginners
Lower the rings slightly so you can use your feet for assistance. This helps you build strength while maintaining proper form.
💡 To build stability and engage your stabilizer muscles, practice static holds at the top and bottom of the dip position. You'll be surprised at how much these humble you are.
Pull-ups 🏋️♂️
For pull-ups, set the rings so the handles are at eye level or slightly above, ensuring you can grip them comfortably without jumping.
For muscle-ups
Adjust the rings a bit higher when you mount gymnastic rings to accommodate the transition phase.
This extra height gives you room to perform the movement smoothly.
💡 Mark the ring heights for pull-ups and muscle-ups separately if you frequently alternate between the two exercises.
Adjusting your gymnastic rings is a breeze with these marks, keeping your focus on smashing out those reps.
Rows 🚣♂️
When setting up gymnastic rings for rows, position them waist-high or lower, depending on how challenging you want the exercise to be.
Easier variation
Set the rings higher so your body is more upright. Great for beginners or when you're feeling a bit knackered.
Harder variation
Lower the rings closer to the ground so your body is parallel to the floor. This increases the challenge and recruits more muscles.
💡 Use chalk or tape to mark optimal row heights on the straps for quick adjustments. You'll be stoked at how much time this saves during your workouts.
How to secure gymnastic rings
Testing your gymnastic rings setup is crucial because you're literally putting your life in the hands of this kit.
Whether you're hanging gymnastic rings at home or in the garage, ensuring they're secure lets you train with confidence.
Apply weight gradually 🏋️
Before you start smashing out those ring workouts, you need to make sure your gymnastic rings can handle the pressure.
Pull test
While standing on the ground, grab the rings and give them a firm tug. Listen for any creaks or see if there's any slipping in the straps or cam buckles.
This initial test confirms that your gymnastic rings attachment is solidly built.
Bodyweight hang
Gradually apply your full body weight by performing a controlled hang. Start with a partial hang, adding weight incrementally. Check that the rings remain level and secure.
This step is crucial because it ensures your gymnastic rings home setup can handle the strain of your workouts.
Inspect for wear & tear
Regular inspections help avoid accidents caused by damaged equipment because even the best gear needs a bit of care.
Frayed straps
Look closely for visible fraying, loose threads, or thinning material at high-friction areas like cam buckles or anchor points.
Run your hand over the straps to feel for weak spots. If you notice any issues, it's time to replace them.
Loose hardware
Check that bolts, hooks, or clamps are tightly secured. Use a wrench to tighten any components showing movement.
You don't want to be mid-ring workout and have things come undone.
💡 Keep a spare set of straps handy if yours are heavily used or frequently exposed to outdoor conditions.
This way, you can use it with confidence every time you train.
Uneven gymnastic rings (Common issue #1)
Uneven gymnastic rings can throw off your balance, strain your muscles, and make exercises feel downright awkward. Fixing this issue is crucial because it ensures you're training safely and effectively. Let's get it sorted so you can focus on smashing out your workouts.
Use chalk or markers 🖍️
Marking your straps helps maintain even lengths for consistent ring height.
How to do it
Hang your gymnastic rings where you want them. Measure the distance from the floor to the bottom of each ring with a tape measure. If they're uneven, adjust the shorter strap by loosening it slightly. Once they're level, mark the strap just below the buckle with chalk or a marker to remember the correct length.
Feel it
Run your hand along the strap to confirm it's smooth and flat before tightening. Twists can compromise stability and make adjusting your gymnastic rings a hassle.
Invest in numbered straps 🔢
Numbered straps make alignment easy by providing clear visual markers.
💡 If your straps aren't pre-marked, create your own by measuring equal increments and adding small stickers or coloured marks with a permanent marker.
This lets you adjust both sides accurately every time. Adjusting is a breeze with these marks, keeping your focus on obliterating bar dips and other challenging exercises.
Use a spirit level 🧭
For extra precision, a spirit level ensures your rings are perfectly horizontal.
How to do it
Place the spirit level across the rings and adjust the straps until the bubble is centered. Tighten the straps slowly while keeping the level in place.
💡 If you don't have a spirit level, use a broomstick or a sturdy pole as a substitute. This helps you avoid being humbled by uneven rings during your workout.
Preventing slippage (Common issue #2)
Slipping straps can ruin your workout and lead to instability. Here's how to secure gymnastic rings firmly so you can train with confidence.
Double-looping for better grip 🪢
For smooth surfaces like pull-up bars, looping the straps twice around the anchor adds friction and minimizes slipping.
How to do it
Pass the strap over the bar, then loop it back under and over again before threading it through the buckle. Pull the strap tight, feeling the tension increase as the loops grip the bar.
This method ensures your gymnastic rings attachment stays put, even when you're smashing out those hard-as-nails muscle-ups.
💡 This technique is especially useful when you install gymnastic rings on a pull-up bar at home. It provides extra security without needing additional equipment, so you can focus on your ring workout without worrying about your kit letting you down.
Apply grip tape 🏷️
Grip tape is an inexpensive fix for slippery anchor points like polished bars or metal frames.
How to do it
Wrap the anchor point (e.g., pull-up bar) with a layer of grip tape. The rough texture increases traction and holds the straps firmly in place.
- Feel it: Run your hand over the tape—it should feel slightly abrasive but secure.
Using grip tape can make your gymnastic rings setup feel rock-solid, allowing you to train with confidence knowing your gymnastic rings home setup won't let you down.
Tighten the buckles securely 🔒
Loose buckles are often the culprit for slippage. Always double-check they're properly engaged.
How to do it
Feed the strap through the buckle and pull it taut. Test by tugging firmly on the strap; it should hold steady without sliding.
💡 Remember, when you set up gymnastic rings at home, especially if you're hanging gymnastic rings from a pull-up bar, ensuring the buckles are tight is crucial because you don't want to be mid-ring workout and have things come undone.
Dealing with limited space (Common issue #3)
Small spaces can make setting up gymnastic rings at home tricky, but these tips help you work around the constraints.
Use compact setups 🏠
For tight spaces like apartments or low-ceiling garages, focus on floor-based exercises like rows, push-ups, and support holds.
- 💡 Tip: Portable rigs or doorway pull-up bars designed to hold rings are ideal for small spaces. These options are easy to install and store when not in use.
When you're figuring out how to hang gymnastic rings in an apartment, doorway pull-up bars fit the bill perfectly. They're a breeze to install and don't require permanent fixtures, so you won't upset your landlord. Plus, they make workouts feel a bit more playful without breaking your bank.
Adjustable anchor points 🔄
Choose mounting solutions with multiple height settings, such as ceiling hooks with adjustable positions or portable pull-up bars.
How to do it
Install hooks or use bars that allow you to reposition the straps for various exercises. This flexibility lets you maximize the limited space you have.
Example
Ceiling hooks can be installed into ceiling joists, allowing you to mount gymnastic rings to the ceiling and adjust the gymnastic rings height as needed. Adjusting is a breeze, and you'll be stoked at how versatile your gymnastic rings home setup becomes.
Shorten strap lengths ✂️
Long straps can get in the way, especially in low-ceiling setups.
How to do it
Roll the excess strap length into a neat coil and secure it with velcro ties or rubber bands. This keeps the straps tidy and out of your workout space.
- 💡 Tip: If you feel the coil during exercise, reposition it to the far side of the buckle for comfort.
By managing the strap length, you make adjusting your gymnastic rings a breeze, even in tight spaces.
It's a simple way to keep your focus on smashing out those exercises that challenge your body in ways you never imagined.
Weatherproofing outdoor rings (Common issue #4)
Outdoor setups expose your rings to weather that can wear them out over time.
Add strap covers 🌧️
Wrap the contact points of your straps with rubber tubing, neoprene sleeves, or fabric covers to shield them from sun and abrasion.
How to do it
Cut the tubing or fabric to length, then slide it over the strap where it touches rough surfaces like tree bark. Secure with zip ties if needed.
💡 This not only protects the straps from the elements but also prolongs their life, so you can use with confidence for years to come.
Use waterproof storage 👜
Moisture weakens materials, so always store your rings properly when not in use.
How to do it
Keep your rings in a waterproof gym bag or plastic storage container to protect them from rain or humidity.
- Feel it: Check that the straps are completely dry before packing them away. Damp equipment can lead to mold or weaken the material.
Choose rust-resistant hardware 🛡️
Metal components like carabiners or hooks can rust outdoors. Avoid this by using stainless steel or galvanized metal.
How to do it
Replace any rust-prone hardware with stainless steel carabiners or coated hooks designed for outdoor use.
- Feel it: Run your fingers over the surface to ensure it's smooth and free of rust.
By taking these steps, you're ensuring your gymnastic rings setup remains solidly built, even when exposed to the harsh Australian weather.
You'll feel extremely safe using them, allowing you to focus on obliterating bar dips and other challenging exercises without worrying about your gear.
3 Cost-effective gymnastic rings setup solutions
Setting up gymnastic rings doesn't have to break your bank. Whether you're a DIY enthusiast or just looking for budget-friendly options, there are ways to get a solidly built setup without compromising on safety or quality.
1️⃣ DIY gymnastic rings installation
For those who enjoy hands-on projects, creating your own gymnastic rings setup is not only cost-effective but also rewarding. Here's how to put up gymnastic rings using simple materials you can find at your local hardware store.
First, you want to gather your materials…
Wooden plank 🪵
A 3–5 cm thick hardwood plank for strength and durability.
Carabiners 🪝
Heavy-duty carabiners rated for at least 22 kN (5,000 lbs) for safety.
Straps 🪢
Adjustable straps with cam buckles, often available at hardware stores or online.
Drill 👷♂️
A power drill with bits suited for both wood and any anchors you plan to use.
Optional tools
A jigsaw if you fancy making your own rings.
Then you want to put everything together…
1 - Cut the plank
Cut a wooden plank into a rectangular piece wide enough to span across at least two ceiling joists. This adds stability to your setup when you hang gymnastic rings from the ceiling.
2 - Drill holes
Mark and drill two evenly spaced holes into the plank, about 50 cm apart to match standard gymnastic ring spacing. Knowing how far apart to hang gymnastic rings ensures proper mechanics during exercises.
3 - Secure the plank
Attach the plank to your ceiling joists using lag bolts. Make sure to drill into the center of the joists to maintain strength.
4 - Attach the carabiners
Screw heavy-duty eye bolts into the holes and clip the carabiners onto them. This makes your gymnastic rings attachment sturdy and adjustable.
5 - Thread straps through rings
If you've got your own rings, thread the straps through them, ensuring they're untwisted. Knowing how to tie gymnastic rings properly keeps your setup solidly built.
6 - Hang the setup
Loop the straps over the carabiners. Adjust the gymnastic rings height as needed. Adjusting is a breeze with cam buckle straps, allowing you to switch between exercises easily.
💡 If you're making your own rings, you can bend PVC pipes into a circle and wrap them with grip tape for comfort. Heat the pipes carefully with a heat gun to shape them.
It's a cost-effective way to get started if you're on a tight budget.
2️⃣ Choose durable materials
The right materials ensure your rings last without breaking the bank. Here are two great options for budget-friendly training:
Wooden rings
Naturally textured for a firm grip and often more affordable than metal. They feel rock-solid in your hands, and the feel of wood can't be beat. Plus, they won't irritate the skin during high-rep sets.
Plastic rings
Lightweight and waterproof, plastic rings are ideal for outdoor setups. Choose options with textured surfaces to prevent slipping, even during intense workouts in the heat.
Just be cautious—some users have found that the textured plastic can rub you raw if you're using a proper false grip.
💡 I was concerned at first about plastic rings, thinking they'd feel rough or give me a splinter. But if you choose ones with a smooth finish, they can fit the bill perfectly for your gymnastic rings home setup.
3️⃣ Look for deals & second-hand options
Maximize your savings with these strategies for finding affordable gymnastic rings:
Online marketplaces
Platforms like Gumtree or Facebook Marketplace often feature second-hand rings at a fraction of the retail price.
You might find someone who moved up in skill from "novice" to "intermediate" and is selling their old set.
Holiday sales & bundles
Look out for package deals that include straps, storage bags, or extra accessories. These are common around major shopping events like Boxing Day.
Test before you buy
If buying second-hand, inspect the rings for cracks or damage. Run your fingers along the straps to check for fraying or weakening.
You don't want to be mid-ring workout and have things come undone.
💡 If you find wooden rings that are a bit rough, you can sand them down to make them buttery smooth. Rings are bloody awesome when they're comfortable to grip, and it'll make your workouts feel a bit more playful.
4️⃣ But if you’re not a cheapskate…
Then look into gymnastic rings that people have vetted to “feel very premium” and have “buttery smooth yet grippy” texture.
Buying high-quality gymnastic rings is making the choice to be damn sure you train without unnecessary compromises.
Plus, we do carabiner gymnastic rings, so it’s faster to set up.
Take a look below the comment section to see what I mean 💪😎
Let the gains begin mate!


0 Comments
There are no comments for this article. Be the first one to leave a message!